Republican lawmakers are attempting to overturn the twin pillars of the Biden administration’s climate platform: tax credits for electric vehicles and the Environmental Protection Agency’s new rules to curb tailpipe emissions.
The effort involves new bills introduced by members of Congress, as well as lawsuits filed by state attorneys general, all with the goal of rolling back the minimal progress made by the Biden administration to reduce the share of planet-warming carbon emissions produced by the automotive sector.
Last month, 25 Republican attorneys general filed a lawsuit intended to overturn the EPA’s recently finalized tailpipe rules aimed at slashing greenhouse gas emissions in half by 2032. In a statement, Kentucky Attorney...
As a Flutter developer working with the Google Flutter team and personally in my private time, I encounter and understand the concerns regarding the loading speed of Flutter web apps. Optimizing loading speed is crucial for better performance and a positive user experience, especially as Flutter developers expand into web development. This guide offers actionable strategies and best practices to accelerate the performance of your Flutter web apps.
Rendering
CanvasKit, the default renderer for Flutter web applications, offers high performance and pixel-perfect consistency across platforms by leveraging WebGL. This capability is particularly beneficial for complex graphical applications that require rich animations and high fidelity. However, the inherent file size of CanvasKit (around 1.5 MB) can be a drawback, especially for apps where initial load time is critical.
Although the flutter.js load API parallelizes the download of CanvasKit and main.dart.js, all Flutter widgets have to wait for them to be fully loaded into the browser, potentially leading to noticeable delays before the application becomes interactive. To mitigate these concerns and optimize the loading experience, developers can choose the Wasm rendering mode.
As WebAssembly support in Flutter web is considered experimental and subject to change, these steps are for developers willing to experiment with cutting-edge features. Features and commands might evolve, so always refer to the latest Flutter documentation for current practices.
Compatibility
The dart:html package is not supported when building with Wasm. This limitation means you must carefully consider the APIs on which your app depends. Alternatively, the web package is supported by both dart2wasm and dart2js.
Performance
Wasm not only reduces app size compared to CanvasKit, it’s also faster to start up compared to JavaScript.
Lazy loading
Dart’s deferred imports allow you to split your code and load parts of it only when needed, reducing the initial load time. The following sections discuss how you can use deferred loading.
Declare a deferred import
At the top of your Dart file, declare the import that you want to defer. In your import statement, specify deferred as followed by an identifier. When you need to use the library, load it asynchronously using the loadLibrary() method on the deferred import:
import 'package:myapp/hello.dart' deferred as hello;
In your Flutter app, call this function when needed, for example, as a response to user interactions. The following example loads the needed library when the user presses a widget:
In order to reduce the time taken to display the initial widget of your app, try to not await for costly futures before calling runApp. Some futures can be left un-awaited so they update the UI after they complete. The unawaited function allows app programmers to explicitly tell the “unawaited futures” lint that those futures are not expected to be awaited. This improvement enhances the user experience during both app startup and page loading by making the app feel more responsive. However, it’s important to manage such functions carefully to avoid issues related to app state consistency and resource management.
Flutter automatically handles loading assets at the appropriate resolution based on the device’s pixel density. This ensures optimal visuals across different screen sizes. While it’s important to optimize assets for efficient delivery, prioritize providing assets at the exact resolutions needed before exploring alternative image formats, as we’ll talk about in the next section.
Better image compression
PNG and JPG are among the most prevalent image formats used on websites. These formats are renowned for their widespread support and compatibility. However, emerging next-generation formats like WebP and AVIF offer significant advancements in reducing file sizes without substantially compromising image quality. For instance, a PNG image with an original size of 319 KB can be compressed to just 38 KB in WebP format or, even more impressively, to 10 KB in AVIF format. These reductions in file size are achieved with minimal perceptible loss in quality to the human eye, demonstrating the potential of these formats to enhance website loading speeds while maintaining visual fidelity.
PNG 319 KB / WebP 38 KB / AVIF 10 KB
However, it’s important to note that not all browsers support WebP and AVIF images. Before integrating these formats into your website, verify their compatibility with the browsers your audience uses most frequently. This will help you determine whether these next-generation image formats align with your website’s requirements and audience needs.
Caching
Memory, disk, service workers cache
Leveraging the capabilities of memory cache, disk cache, and Service Workers can significantly reduce loading times after the initial page load. This is because these caching mechanisms require files to be loaded once before they can cache them. Memory cache, stored in RAM, offers rapid access speeds but is volatile. On the other hand, disk cache, although slower, provides persistence. Service Workers act as programmable network proxies, enabling sophisticated caching strategies across both memory and disk.
Browsers or operating systems usually manage memory and disk caches automatically, eliminating the need for manual intervention unless there’s a specific requirement to manipulate them programmatically. While Flutter manages Service Workers to some extent, developers have the flexibility to implement custom Service Workers alongside Flutter for enhanced control over caching and network interactions.
Wasm
Browsers cache Wasm files (like CanvasKit, and soon dart2wasm output) as well as their compiled native code. This means cached Wasm modules load as quickly as native binaries, unlike JavaScript, which requires reparsing, recompilation, and reJIT (Just-In-Time) processing.
While Flutter’s Wasm build option isn’t fully stable yet, adopting modern JS-interop practices benefit you when dart2wasm stabilizes. For example, avoid using legacy libraries like dart:html and dart:js, and prefer package:web and dart:js_interop. Also, consider checking whether other packages you are using are compatible with Wasm.
Preloading
HTML <head tag>, HTTP response headers
Preloading assets like images, fonts, and JavaScript files can significantly improve webpage loading speed. By preloading within the HTML <head> tag or using HTTP response headers, you instruct the browser to download these resources before they’re needed for rendering. This eliminates delays and ensures a smoother user experience. To preload assets, add the <link> tag in the <head> section and set the rel attribute to preload. Only preload assets that are used immediately, optimally in the first screen of your app, otherwise browsers will consider the preloading as a waste of bandwidth.
Flutter empowers you to build fully interactive landing pages for your app using plain HTML/CSS. While users engage with your landing page, flutter.js preloads your Flutter app — ensuring instant launches when the user navigates to the Flutter app. This is especially beneficial for games with a Play button and apps that require logging in.
Loading/splash screen
While we’ve focused on technical optimizations for app loading speed, perceived loading speed is more critical. Your goal should be to make your app feel fast.
Loading/splash screens are highly effective in enhancing this perception. By providing visual activity, they reassure users that the app is launching promptly. In contrast, a blank screen breeds uncertainty, potentially leading to frustration and page refreshes.
For the fastest responsiveness, implement your splash screen directly in your index.html file using plain CSS/HTML. This minimizes any potential delays.
In this doc, we’ve explored ways to accelerate both the initial loading and rendering performance of your Flutter web app. There are various strategies you can employ, but remember that each solution involves trade-offs. Choose the optimizations that best suit your specific needs and those of your users. By combining these approaches, you’ll create a smoother, more responsive user experience for your Flutter web apps.
OpenAI and the developer platform Stack Overflow have announced a partnership that could potentially improve the performance of AI models and bring more technical information into ChatGPT.
OpenAI will have access to Stack Overflow’s API and will receive feedback from the developer community to improve the performance of AI models. OpenAI, in turn, will give Stack Overflow attribution — aka link to its contents — in ChatGPT. Users of the chatbot will see more information from Stack Overflow’s knowledge archive if they ask ChatGPT coding or technical questions. The companies write in the press release that this will “foster deeper engagement with content.”
Stack Overflow will use OpenAI’s large language models to expand its Overflow AI,...
A new feature in the .NET MAUI Community Toolkit allows developers to interact with any visual element in an app based on touch, mouse clicks and hover events.
Incorporating new technology into your organization’s workflow involves more than just understanding the tool—it requires a culture shift towards community. By creating a destination for inspiration and knowledge sharing, you can enable your teams and individuals to accomplish more together.
GitHub Discussions is a dedicated space for conversations. It decreases the burden of managing active work in issues and pull requests by providing a separate space to host ongoing discussions, questions, and ideas. We use GitHub Discussions to enable dialogue among tens of thousands of community members via the GitHub Community Discussions, to host a private GitHub maintainers community, and to support team-internal conversations.
We created GitHub Community-in-a-box, packaging up tooling, resources, and knowledge, for organizations of all sizes, to enable our customers to build internal communities of learning at scale using GitHub Discussions.
Let’s take a look at ways to manage GitHub Discussions for your community, best practices for moderation, tips for promoting healthy engagement and content creation, and ideas for going the extra mile for your community.
When might GitHub Discussions be useful for you?
You can use GitHub Discussions to chat about big-picture ideas, brainstorm, and develop a project’s specific details before committing it to an issue, which can then be scoped. GitHub Discussions is useful for teams in a number of scenarios:
You are in the discovery phase of a project and are still learning which direction your team wants to go in.
You want to collect feedback from a wider community about a project.
You want to keep bug fixes, feature requests, and general conversations separate.
You want to measure interest in new ideas and gauge community opinion using polls.
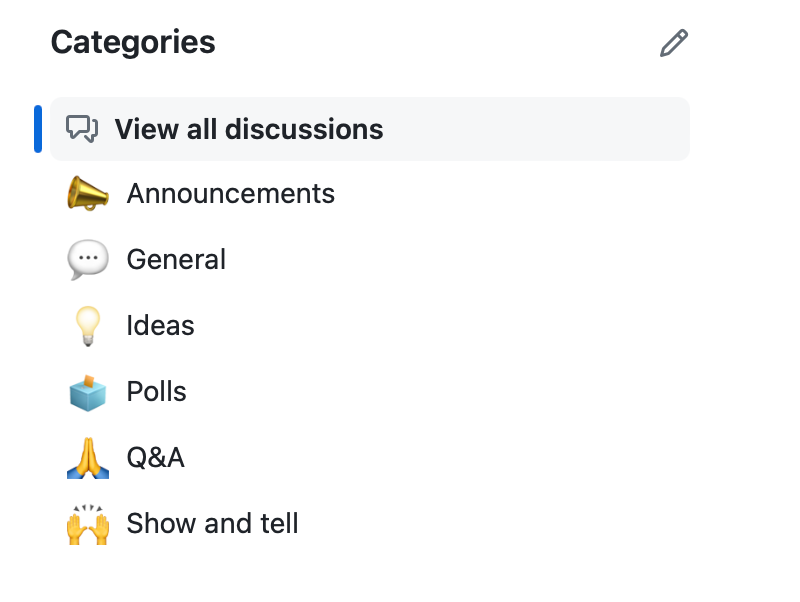
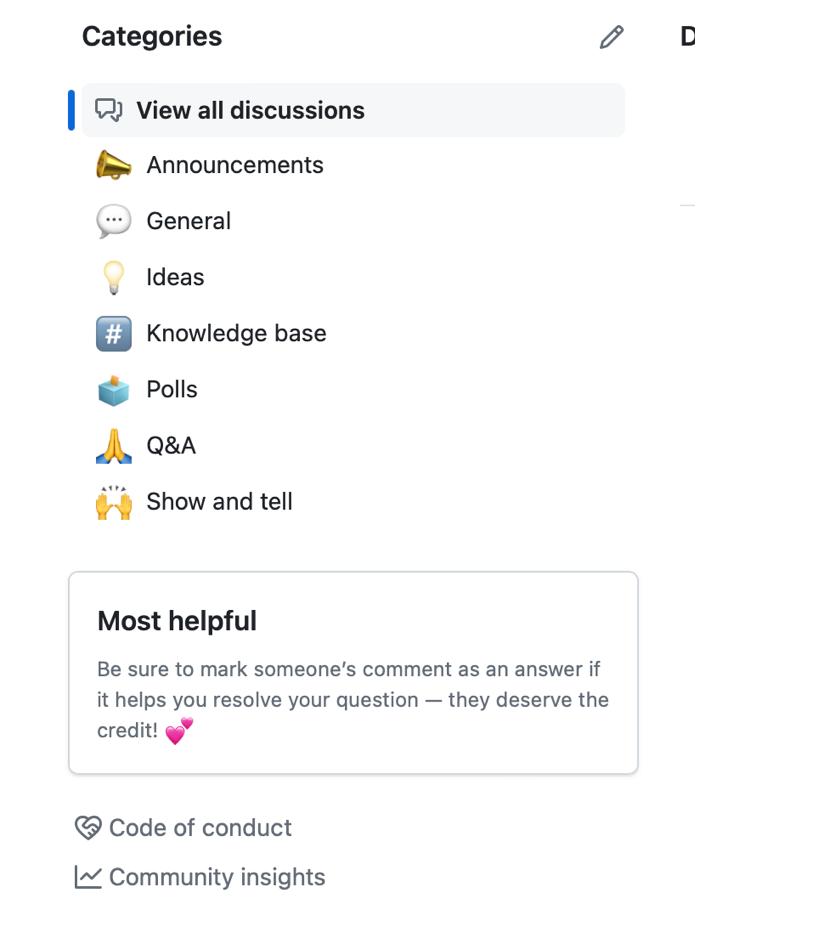
Think about the topics your community will likely discuss and group them into the most relevant categories. This will ensure your community stays neat and organized. GitHub Discussions come with a few default categories:
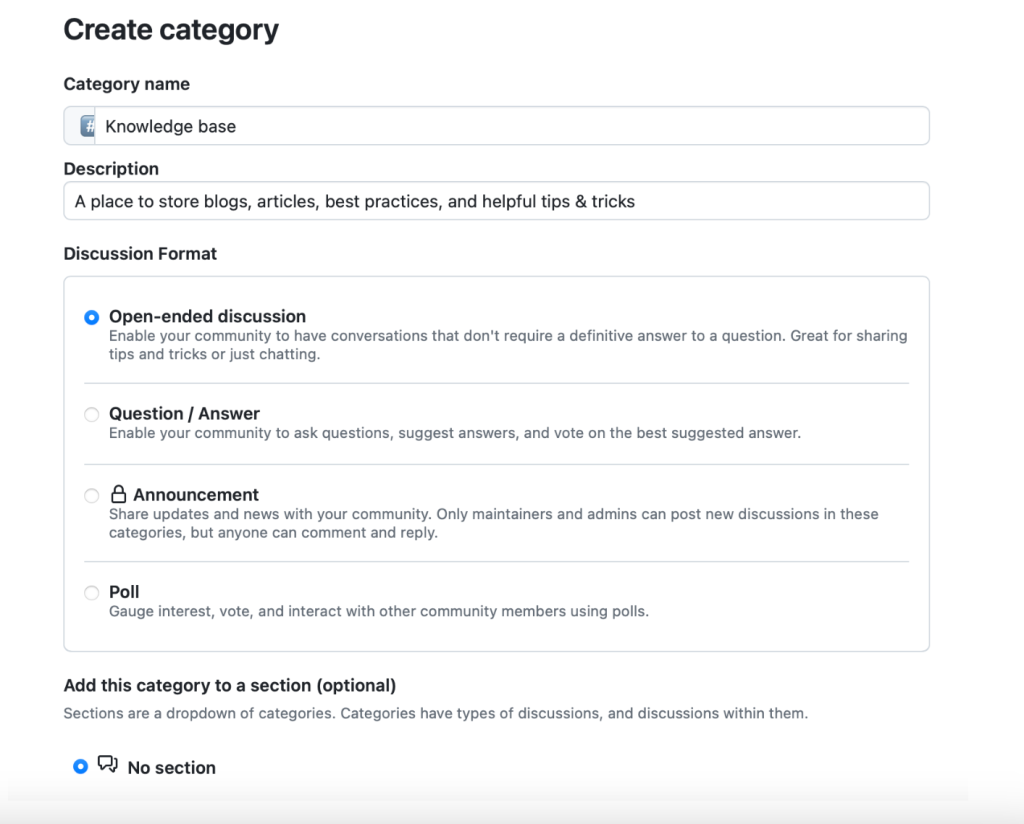
But it takes seconds to set up additional ones, as you can see in the example below:
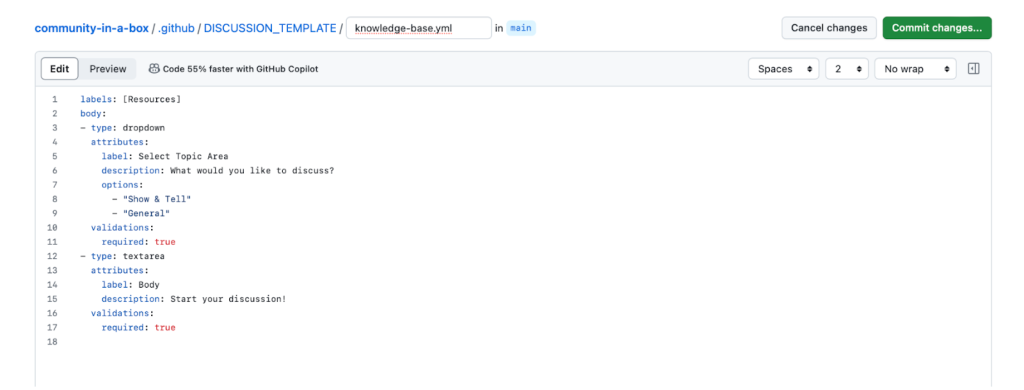
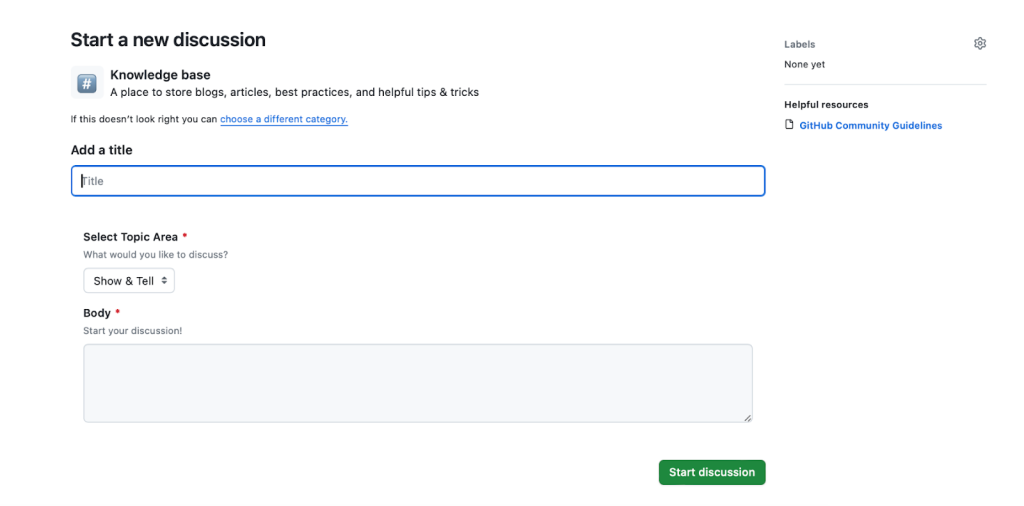
You can encourage community members to include specific, structured information in their discussions by using discussion forms in your repository. Let’s make a basic category form for our Knowledge base category we created in the last step:
Once you commit the change and start a new discussion for the Knowledge base category, you will see your category form in action:
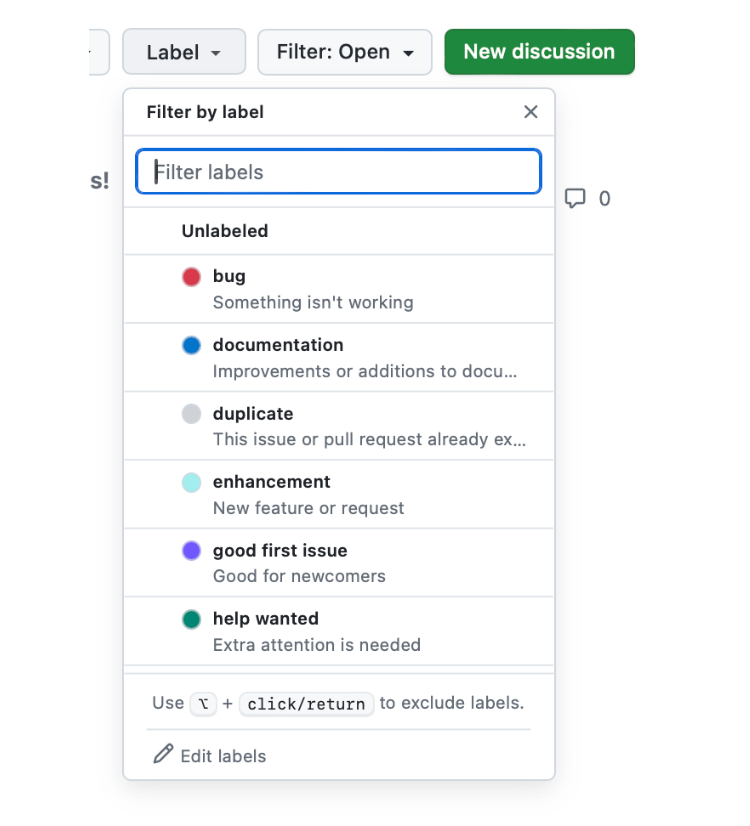
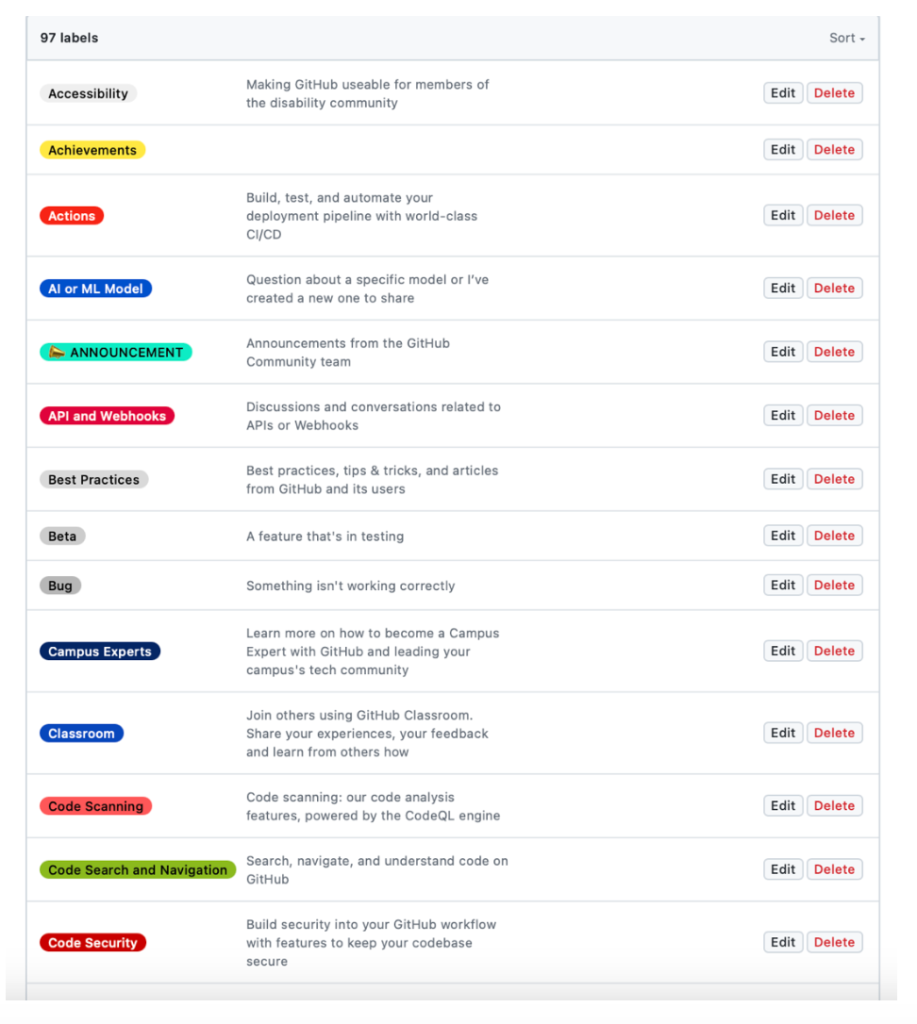
This will enable your community to filter by relevant labels and will also create more meaningful data insights for your community. Similar to categories, GitHub Discussions comes with a set of default labels:
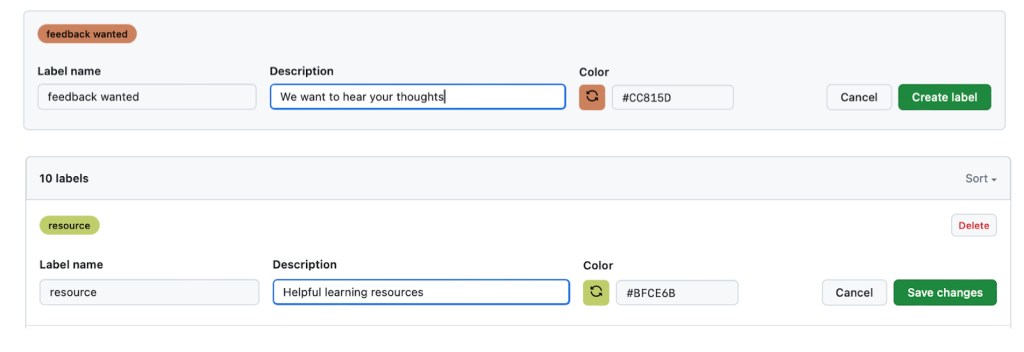
But let’s create a few additional ones that meet our community’s needs:
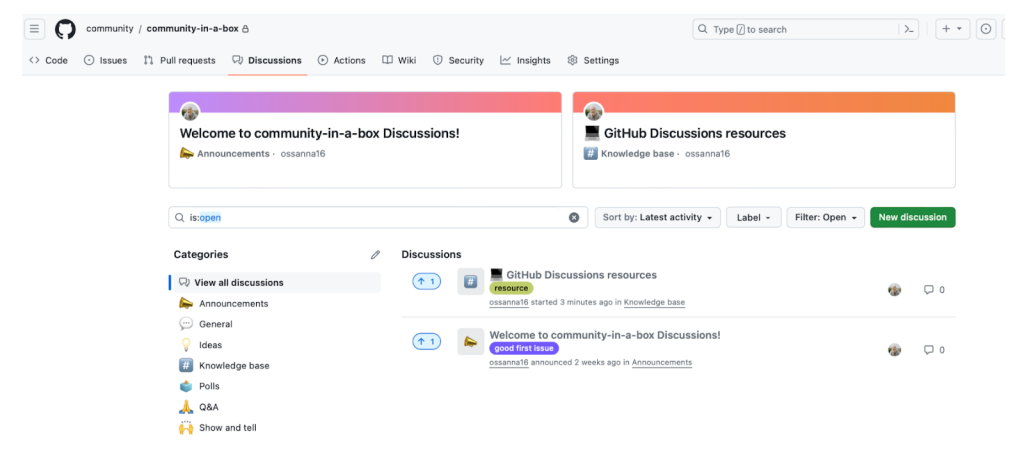
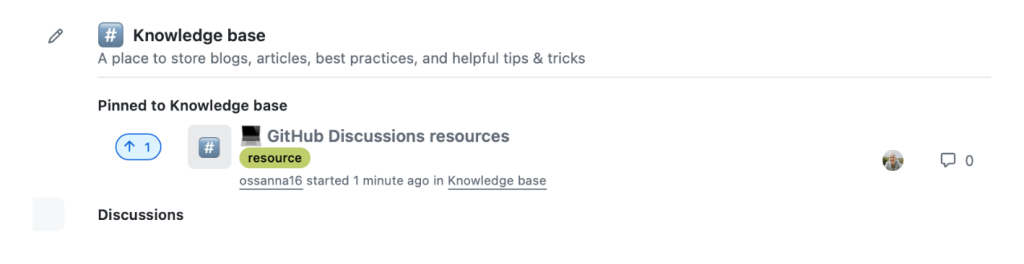
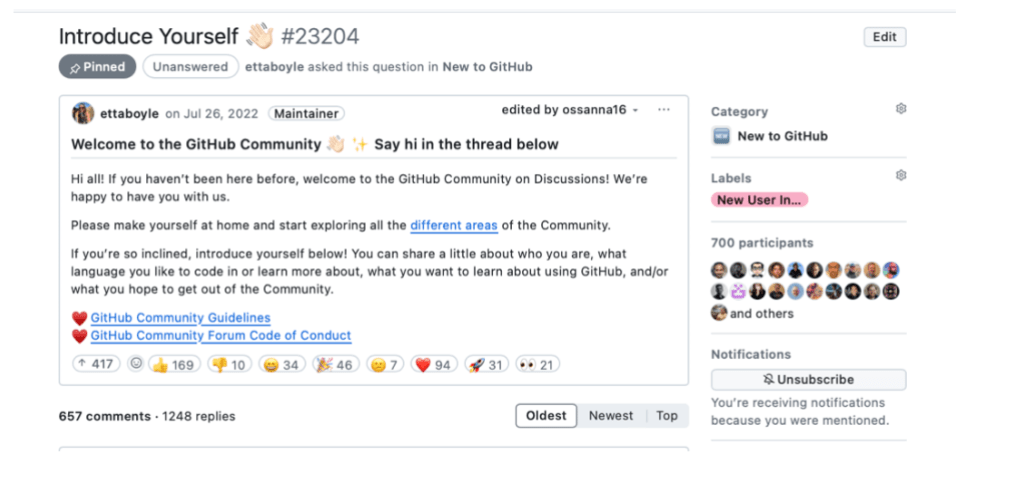
You can pin a discussion for the repository as I have done here with my GitHub Discussions resources post:
Or to a specific category:
The globally pinned discussions will be shown in addition to the discussions pinned to a specific category.
Deep dive: GitHub Discussions moderation
Moderation of a community is incredibly important to the overall community health (see the GitHub Docs for detailed guidance). The following best practice tips will help you maintain an active and healthy community:
1. Reply to posts in assigned categories.
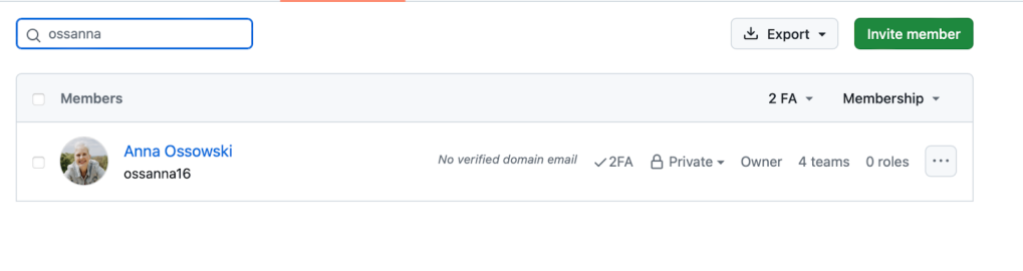
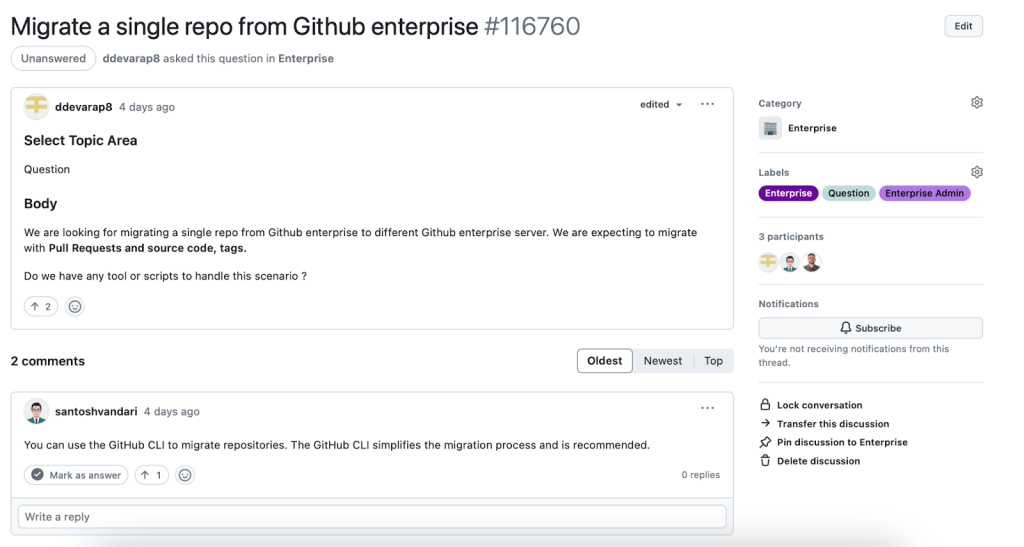
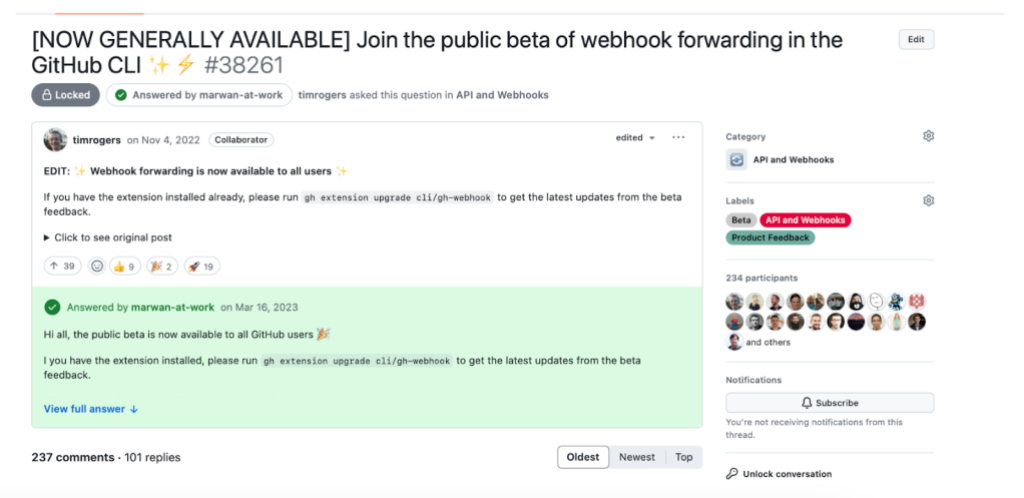
Replying to questions and comments within a reasonable amount of time (such as in this example) is important to ensure community members find value in your discussions instance, and will encourage them to return and actively contribute to your community. In order to manage the workload we recommend assigning dedicated moderators per category depending on the new discussions volume created per day.
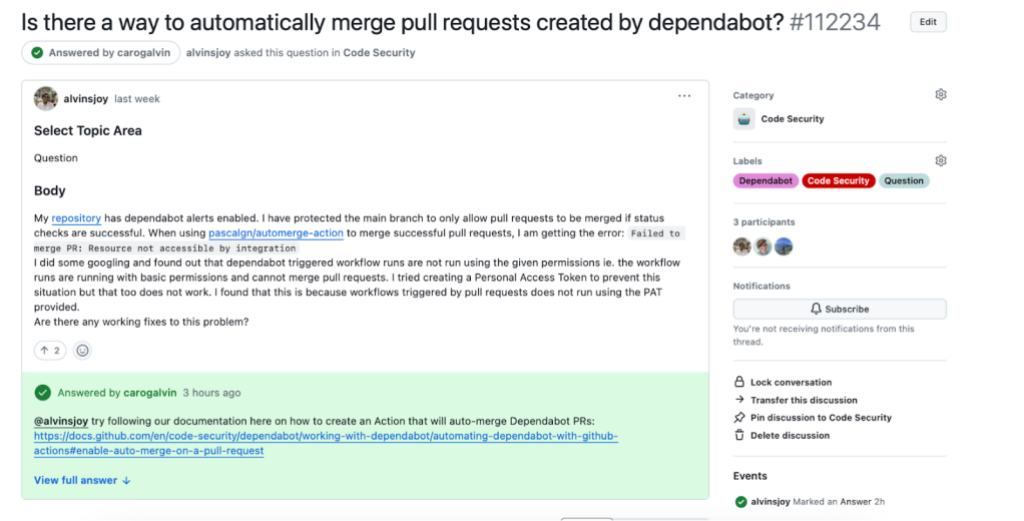
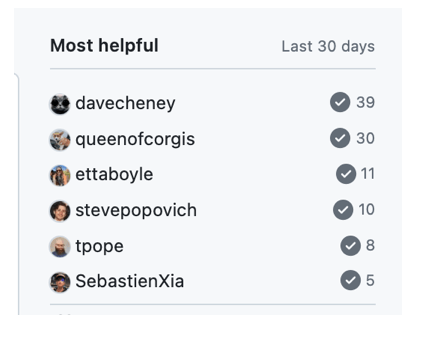
This will aid community members in finding solutions to their questions and will motivate contributions as community members with the highest number of marked answers will appear in the “Most helpful” leaderboard of your GitHub Discussions community.
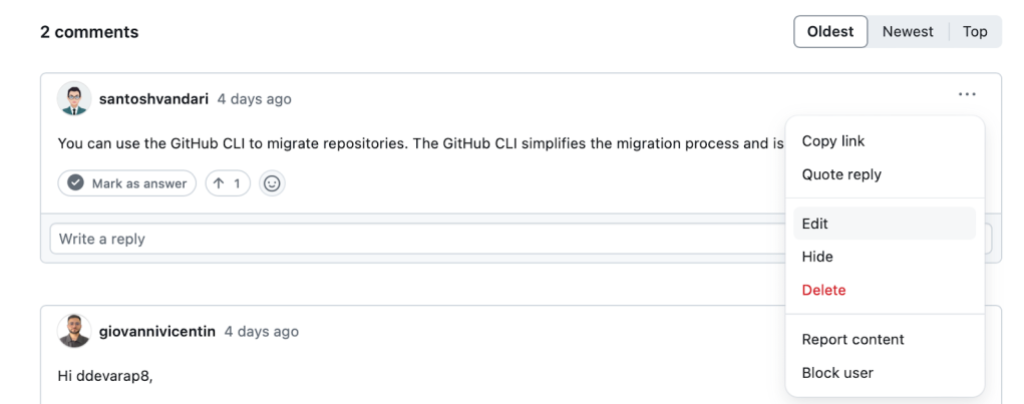
3. Manage spam.
Spam is unlikely to occur in an internal community, however, it may happen that community members post comments that are off-topic or engage in heated discussions. We recommend you warn offenders and hide their discussions. In cases of repeat abuse, you may want to consider blocking someone from your community completely.
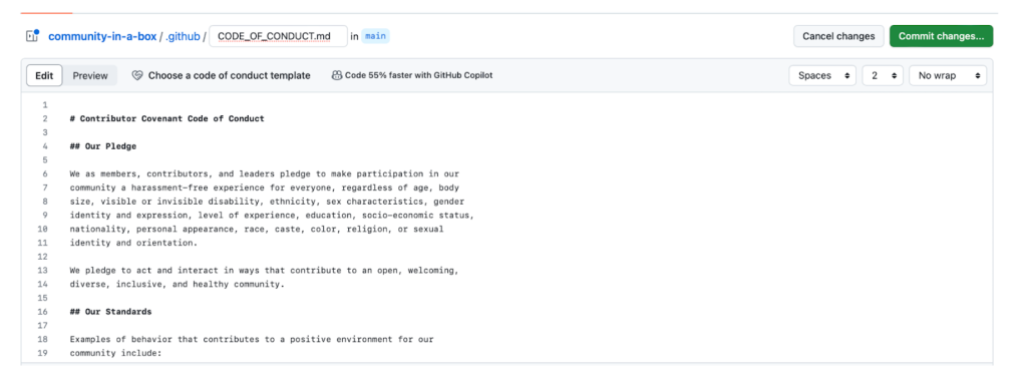
We recommend adding a Code of Conduct to define community standards, signal a welcoming and inclusive project, and outline procedures for handling abuse. When you add a Code of Conduct like the Contributor Covenant Code of Conduct to your repository, it will automatically be linked in your discussions instance as well once you commit the file.
You may want to consider creating other community health files depending on your specific needs.
4. Lock or unlock discussions.
This is a valuable feature for scenarios when you want to keep a discussion in your community in “read-mode” only but don’t want to enable community members to leave further comments (for example, you requested feedback for a feature but collected enough information). Have a look at this post from the GitHub Community Discussions for reference:
5. Edit or delete comments.
You have the option to edit or delete comments in case community members post inappropriate content or confidential information.
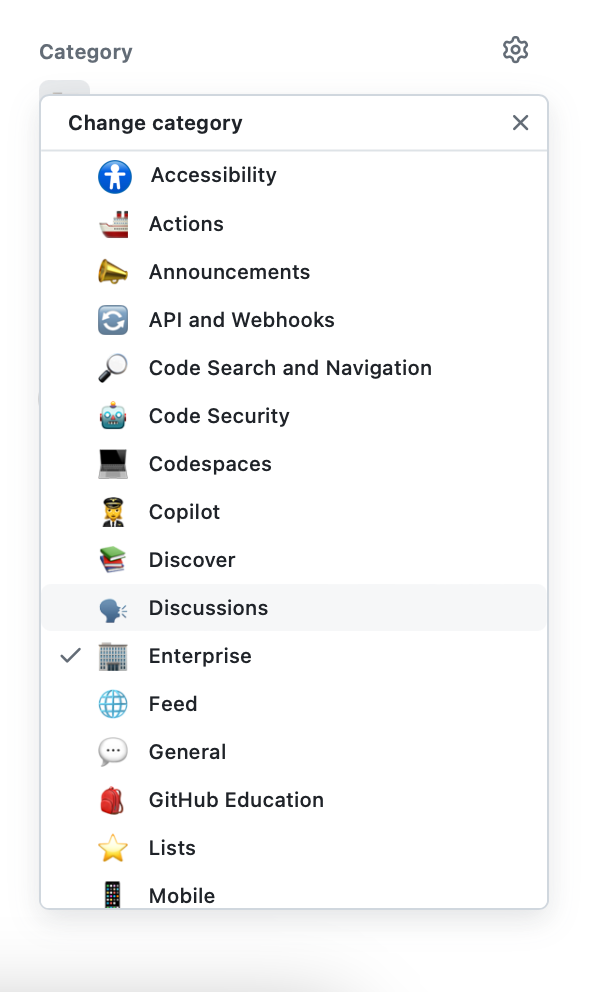
6. Recategorise posts.
Community members may accidentally post discussions in the wrong category. To keep your community clean and tidy, we recommend you move posts to the correct category.
7. Apply labels.
We recommend creating a variety of labels with regards to the format (for example,question, feature request, bug report, feedback) as well as topic (for example, GitHub Actions, GitHub Copilot, GitHub Codespaces) of discussions within your community. The ability to filter by labels will ease moderation, help community members find the right answers, and enhance the data you collect. To gain inspiration, take a peek at the labels we use in the GitHub Community Discussions.
Going the extra mile
In the section above we described the basics of community management. If you want to take it a step further and provide the best experience for community members, here are a few more suggestions:
1. Welcome new community members
When someone new joins your community, make an effort to send them a personal welcome message. You can even start an “Introduce Yourself” thread (tip: pin the thread globally or in the right category) for community members to post little paragraphs about themselves and to make their first discussions contribution as easy as possible.
2. Look for community members who are actively participating and posting great answers— appreciate and motivate them.
Each community has certain members who go above and beyond to be helpful to others. They are the pillars of your community. To help retain your top contributors and to keep them motivated, show them some love. You can do so for example by highlighting them in a discussions post. The Most helpful leaderboard will show your community’s top contributors over the past 30 days:
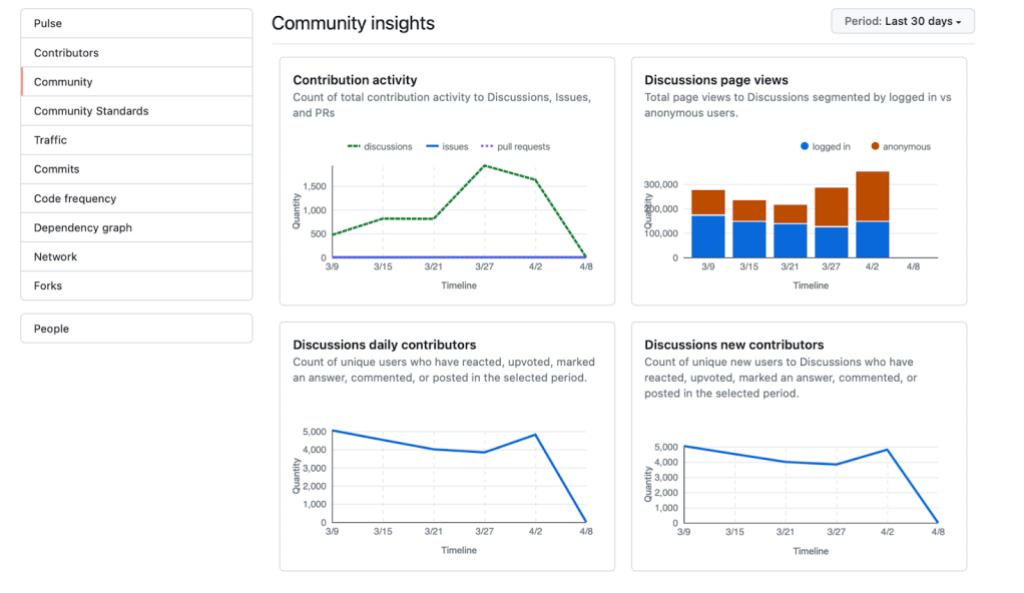
3. Analyze your GitHub Discussions data and determine trending topics.
Use Discussions insights to understand the contribution activity, page views, and growth of your discussions community. In addition, you can see what is most popular in your categories and track the top viewed posts every week. This information can help you craft content based on topics community members seem to struggle with or are most interested in.
4. Create content to generate engagement and enhance your community knowledge base.