Sr. Content Developer at Microsoft, working remotely in PA, TechBash conference organizer, former Microsoft MVP, Husband, Dad and Geek.
149535 stories
·
33 followers

tree-me: Because git worktrees shouldn’t be a chore

1 Share

I firmly believe that Git worktrees are one of the most underrated features of Git. I ignored them for years because I didn’t understand them or how to adapt them to my workflow.

Tree with multiple branches representing git worktrees

But that changed as I began using LLM coding tools to do more work in parallel. Being able to work on multiple branches simultaneously is a game changer.

Without git worktrees, working on multiple branches at the same time in the same repository is a pain. There’s the serial approach where you stash your changes, context switch, and pray you didn’t break anything. Or worse, just commit half-finished work with “WIP” messages (looking at you, past me). Or you can have multiple clones of the same repository, but that’s a pain to manage and can take up a lot of disk space.

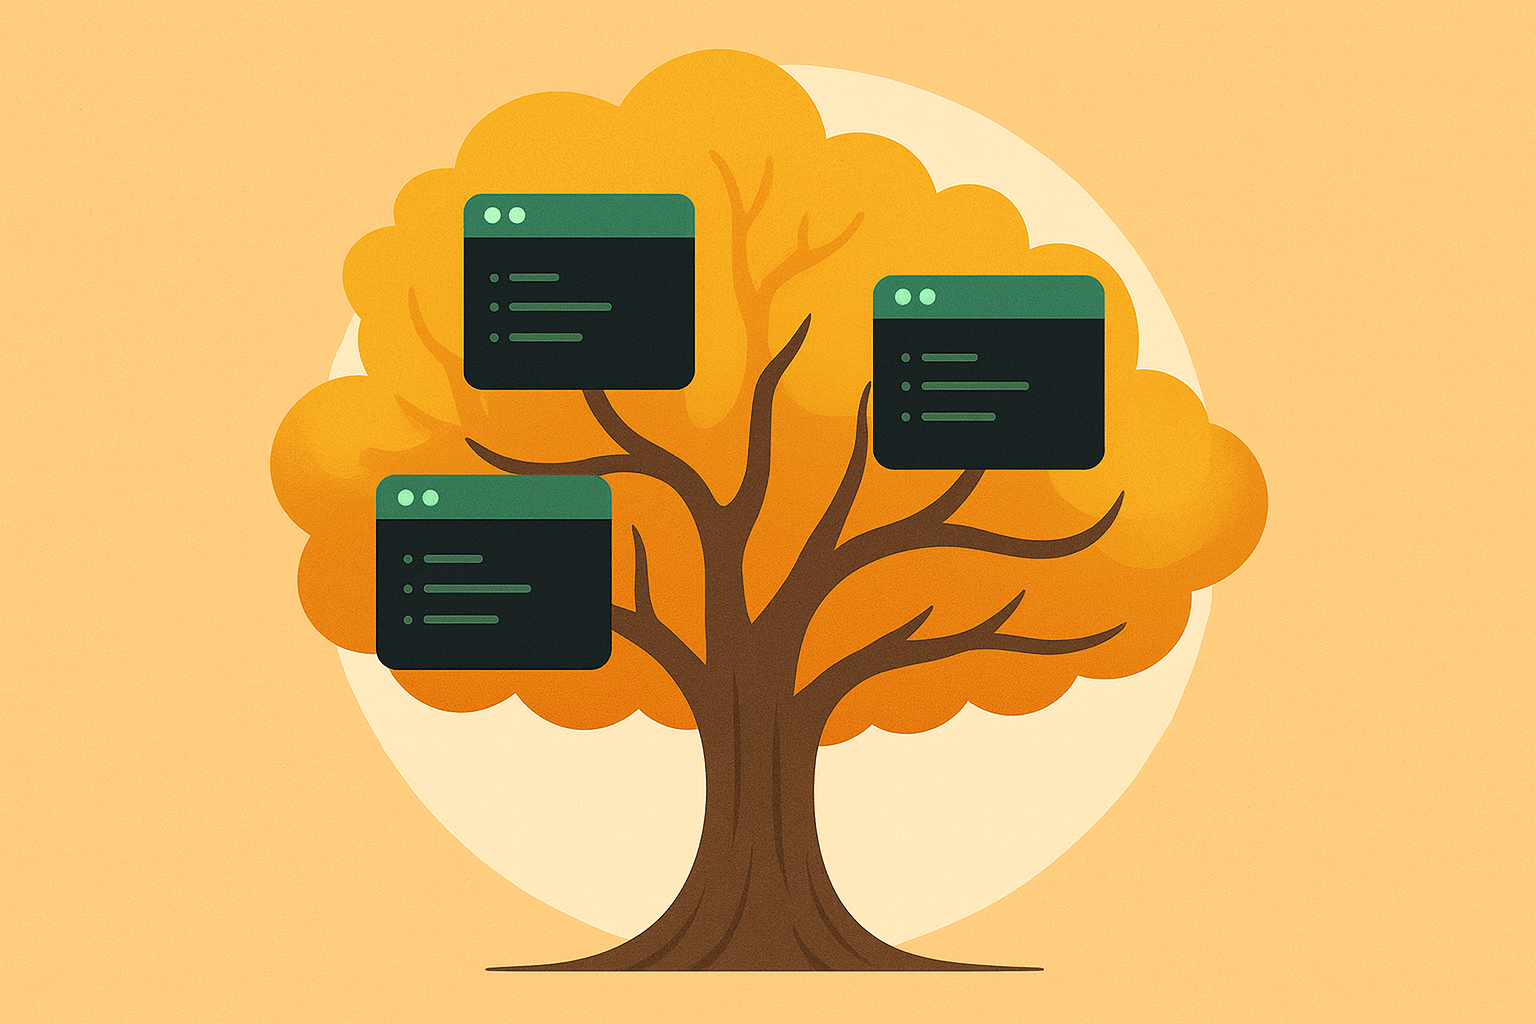
Git worktrees solve this. They let you have multiple branches checked out simultaneously in different directories that all share the same git database (aka the .git directory). For me, this means I can work on a feature in one terminal, review a PR in another, have Claude Code work on another feature in another terminal, and have all of them share the same git history.

But here’s the thing: creating worktrees manually is tedious. You need to remember where you put them, what to name them, and clean them up later. Also, by default the git worktree is created in the root of the repository unless you specify a different directory.

I wanted something simpler. I wanted something that would work across any repository. No setup, no configuration files, just sensible defaults.

Enter tree-me

I built tree-me, a minimal wrapper around git’s native worktree commands. It adds organizational convention while letting git handle all the complexity.

Instead of this:

# Create worktree manually
mkdir -p ~/worktrees/my-project
git worktree add ~/worktrees/my-project/fix-bug -b haacked/fix-bug main
cd ~/worktrees/my-project/fix-bug
# Now repeat for every repo...

You do this:

tree-me create haacked/fix-bug
# Creates: ~/dev/worktrees/my-project/haacked/fix-bug
# And automatically cds into it

How it works

tree-me uses git-like subcommands and follows conventions so you don’t have to think:

  • Auto-detects repository name from your git remote
  • Auto-detects default branch (checks for origin/HEAD, falls back to main)
  • Organizes by repo: $WORKTREE_ROOT/<repo-name>/<branch-name>
  • Delegates to git for all validation, errors, and edge cases
  • PR support: Fetches GitHub PRs using git’s native PR refs (requires gh CLI)
  • Auto-CD: Automatically changes to the worktree directory after creation
  • Tab completion: Complete commands and branch names in bash/zsh

Commands:

tree-me create <branch> [base]        # Create new branch in worktree
tree-me checkout <branch>             # Checkout existing branch (alias: co)
tree-me pr <number|url>               # Checkout GitHub PR (uses gh CLI)
tree-me list                          # List all worktrees (alias: ls)
tree-me remove <branch>               # Remove a worktree (alias: rm)
tree-me prune                         # Prune stale worktree files
tree-me shellenv                      # Output shell function for auto-cd

Examples:

tree-me create haacked/fix-bug              # Create from main/master
tree-me create haacked/fix-bug develop      # Create from develop
tree-me co existing-feature                 # Checkout existing branch
tree-me pr 123                              # Checkout PR #123
tree-me pr https://github.com/org/repo/pull/456
tree-me ls                                  # Show all worktrees
tree-me rm haacked/fix-bug                  # Clean up (supports tab completion)

Conventions

tree-me is a minimal wrapper around git’s native commands. Works with any repo, any language, any setup. The only convention is where worktrees live and how they’re named.

Want worktrees in a different location? Set WORKTREE_ROOT. Need to branch from develop instead of main? Pass it as an argument: tree-me create my-feature develop. Conventions with escape hatches.

Setup

To enable auto-cd and tab completion, add this to your ~/.bashrc or ~/.zshrc:

source <(tree-me shellenv)

This makes tree-me create, tree-me checkout, and tree-me pr automatically cd into the worktree directory. It also enables tab completion for commands and branch names (try tree-me rm <TAB>).

View the full implementation at github.com/haacked/dotfiles/blob/main/bin/tree-me.

The PR workflow

Here’s where it shines. Someone asks you to review a PR while you’re deep in a feature:

tree-me pr 123                  # Fetches, checks out PR, and cds into it
# You're now in: ~/dev/worktrees/dotfiles/pr-123
# Review the code, test it, leave comments
# When done, switch back
tree-me co haacked/my-feature   # Checks out and cds back to your feature
# Back to your work, no stash needed

When you’re done reviewing:

tree-me rm pr-123               # Tab complete to see available branches

Gone. Clean. No accidentally committing review changes to your feature branch.

Note

tree-me uses the gh CLI to fetch PRs. If you don’t have it installed, you can install it with brew install gh.

Installation

Download tree-me and put it somewhere in your PATH:

# Example: copy to ~/bin or ~/.local/bin
curl -o ~/bin/tree-me https://raw.githubusercontent.com/haacked/dotfiles/main/bin/tree-me
chmod +x ~/bin/tree-me

Then enable auto-cd and tab completion (see Setup section above).

That’s it. No dependencies beyond git, bash, and optionally the gh CLI for PR checkout.

Why I built this

I work on multiple repos daily—PostHog, my blog, various open source projects. I was tired of remembering project-specific worktree scripts and hunting for that worktree I created last week.

The philosophy: Don’t recreate what git does well. Add only the minimal convention needed.

Git already handles worktrees perfectly. I just needed organized paths, sensible defaults, and a consistent interface across all my projects.

Directory structure

Everything is organized predictably based on the repository name and branch name:

~/dev/worktrees/<repo-name>/<branch-name>

For example:

~/dev/worktrees/
├── dotfiles/
│   ├── haacked/vim-improvements/
│   ├── haacked/git-tools/
│   └── main/
├── posthog/
│   ├── haacked/feature-flags/
│   ├── pr-789-contributor/
│   └── main/
└── spelungit/
    └── haacked/performance/

One glance and you know where everything is.

What it doesn’t do

tree-me doesn’t copy environment files, install dependencies, or set up project-specific tools. That’s deliberate. Those concerns belong in your project’s setup scripts, not in a generic git tool.

Want to automate environment setup? Add a script to your repo that runs after checkout. Want to copy .env files? Put it in your project’s onboarding docs. tree-me just handles the git worktree ceremony.

Try it

If you work with multiple branches regularly, give worktrees a try. If you work with multiple repos, give tree-me a try. If you hate it, at least you learned about git worktrees (and that’s probably worth more than the script).

Find tree-me at github.com/haacked/dotfiles/blob/main/bin/tree-me. It’s MIT licensed—copy it, modify it, improve it.

Read the whole story
alvinashcraft
just a second ago
reply
Pennsylvania, USA
Share this story
Delete

A Comprehensive Guide to Auth0 Security Against Identity Attacks

1 Share
A deep-dive guide for developers on essential Auth0 security best practices. Learn to prevent misconfigurations, account fraud, MFA bypass, and token hijacking.

Read the whole story
alvinashcraft
11 seconds ago
reply
Pennsylvania, USA
Share this story
Delete

Navigating Microsoft's Copilot Studio and Azure AI Foundry

1 Share

Key Insights into Microsoft's AI Landscape

  • Copilot Studio: Excels in rapid, low-code/no-code development of conversational AI for quick deployment and Microsoft 365 integration.
  • Azure AI Foundry: Offers comprehensive, code-first AI lifecycle management for advanced customization, enterprise-grade solutions, and deep control over models and data.
  • Synergistic Approach: The most effective strategy often involves using Copilot Studio as the user-facing interface and Azure AI Foundry as the robust backend engine for complex AI tasks.

In the rapidly evolving landscape of artificial intelligence, Microsoft provides two powerful yet distinct platforms for AI development: Copilot Studio and Azure AI Foundry. While both aim to empower organizations with AI capabilities, they cater to different needs and technical expertise levels. Understanding their individual strengths and, crucially, how they can be strategically combined, is paramount for building effective and scalable AI solutions. This guide delves into the specific scenarios where each platform shines and illustrates the immense benefits of a unified approach.

Copilot Studio: Rapid Conversational AI Development

Simplifying AI Agent Creation for Business Users and Quick Deployments

Copilot Studio is designed for speed and accessibility, making it an ideal choice for users who need to build conversational AI agents without extensive coding knowledge. It offers a low-code/no-code environment that empowers business users, analysts, and citizen developers to create, deploy, and manage AI-powered chatbots and virtual assistants with remarkable efficiency.

Copilot Studio is accessible from https://copilotstudio.microsoft.com and can be used through different licensing options.

Key Characteristics and Use Cases of Copilot Studio

Copilot Studio's appeal lies in its user-friendly interface and seamless integration with the Microsoft ecosystem:

  • Low-code/No-code Development: Its visual canvas allows for intuitive design and deployment of agents, making AI accessible to a broader audience.
  • Rapid Deployment: Ideal for scenarios requiring quick prototyping and deployment of conversational bots, often within hours or days.
  • Microsoft 365 Integration: Tightly integrated with applications like Teams, Outlook, and SharePoint, it's perfect for enhancing productivity within the M365 environment. It can extend Microsoft 365 Copilot's capabilities to connect with external systems.
  • Simple Workflows: Best suited for tasks such as IT helpdesk FAQs, HR policy queries, basic customer service, and routine automation.
  • Limited Customization Needs: When pre-built templates and standard models are sufficient, Copilot Studio provides a straightforward path to implementation.

Examples of Copilot Studio in action include internal HR bots for answering common employee questions, customer service agents handling FAQs on websites, and bots automating routine tasks like generating reports or summarizing meetings. It prioritizes ease of use and quick time-to-value, making it a go-to for organizations seeking to rapidly implement conversational AI.

Azure AI Foundry: For Advanced AI Development

Comprehensive Control for Developers and Data Scientists

Azure AI Foundry, formerly known as Azure AI Studio, is a code-first, comprehensive platform built for developers and data scientists who demand granular control over the entire AI lifecycle. It provides a robust environment for building, deploying, managing, and monitoring complex, enterprise-grade AI applications.

The Azure AI Foundry Management Center is available from https://ai.azure.com. While there is no specific license cost for using Azure AI Foundry, note that the different underlying Azure services such as Azure OpenAI, Azure AI Search and the LLMs will incur consumption costs.

Key Characteristics and Use Cases of Azure AI Foundry

Azure AI Foundry is tailored for sophisticated AI projects requiring deep customization and robust governance:

  • Code-first Environment: It caters to developers and data scientists proficient in languages like Python and tools such as PromptFlow, offering unparalleled control over models and data.
  • Full AI Lifecycle Management: From model selection and grounding to prompt testing, deployment, evaluation, tracing, and monitoring, Azure AI Foundry covers every stage of AI development.
  • Advanced Customization: Ideal for scenarios requiring specialized models, stronger reasoning capabilities, image analysis, and domain-specific AI solutions.
  • Enterprise-Scale Solutions: Designed for production-ready applications that necessitate robust monitoring, tracing, compliance features, data security, and privacy.
  • Data-Sensitive Operations: Provides granular control over how AI models handle sensitive internal data, ensuring compliance and security.

Use cases for Azure AI Foundry include developing sophisticated AI agents for cyber threat detection, legal document summarization, visual issue detection in IT support, and orchestrating multi-agent systems. It's the platform of choice for organizations needing to own and manage all aspects of their copilots, ensuring high levels of customization, security, and scalability.

Azure AI Foundry specializes in advanced AI capabilities like Retrieval-Augmented Generation (RAG)model benchmarking, and multi-modal integrations.

When to Use Both

Combining Accessibility with Power for Comprehensive Solutions

For many organizations, the most effective AI strategy isn't choosing between Copilot Studio and Azure AI Foundry, but rather leveraging their complementary strengths. This hybrid approach allows for the agility of low-code development while maintaining the control and power of a code-first platform.

Strategic Integration Models

The synergy between Copilot Studio and Azure AI Foundry can manifest in several powerful ways:

  • Frontend/Backend Architecture: Copilot Studio can serve as the intuitive, user-facing conversational interface (the "front door"), while Azure AI Foundry acts as the powerful backend processing engine (the "engine room"). Copilot Studio captures user requests and routes complex queries or reasoning tasks to Azure AI Foundry for processing, leveraging its advanced models, knowledge bases, and enterprise controls.
  • Progressive Complexity and Cost Optimization: Begin with Copilot Studio for rapid prototyping and simpler AI agents. As requirements evolve and solutions demand deeper customization, integration with sensitive data, or robust governance, migrate or integrate complex components with Azure AI Foundry. This also allows for cost optimization by handling lightweight tasks in Copilot Studio while scaling heavy inference in Azure AI Foundry.
  • Leveraging Custom Models: Azure AI Foundry allows organizations to develop and deploy custom, specialized models. These models can then be directly integrated and consumed within Copilot Studio prompts, enabling low-code agents to leverage highly tailored and powerful AI capabilities.
  • Multi-channel Deployment and Enterprise Governance: Deploy Copilot Studio agents across various channels like Teams, web, and mobile, providing a consistent user experience. Simultaneously, utilize Azure AI Foundry for compliance-controlled processing, robust monitoring, and centralized governance of AI assets.

This combined approach allows organizations to harness the benefits of both platforms: the speed and accessibility of Copilot Studio for conversational AI, and the depth of control, customization, and full lifecycle management offered by Azure AI Foundry for advanced, enterprise-grade applications.

Comparative Analysis

A Side-by-Side Look at Capabilities and Best-Fit Scenarios

To further clarify the distinction and complementary nature of these platforms, let's compare their core capabilities and ideal applications:

Feature/Aspect

Copilot Studio

Azure AI Foundry

Combined Approach

Development Model

Low-code/No-code, visual canvas

Code-first, SDKs, PromptFlow

Hybrid: Low-code frontend, code-first backend

Primary Users

Business users, citizen developers, analysts

Developers, data scientists, AI engineers

Cross-functional teams

Speed of Deployment

Very fast (hours to days)

Moderate to fast (days to weeks, depending on complexity)

Fast prototyping, robust scaling

Customization Level

Limited (templates, connectors)

Extensive (custom models, tools, logic)

Tailored UX with advanced AI logic

Integration Ecosystem

Microsoft 365, Power Platform

Azure services, broad model catalog, external systems

Comprehensive M365 and broader enterprise integration

AI Lifecycle Management

Basic (build, test, publish, analytics)

Full (model selection, grounding, evaluation, monitoring, tracing)

Streamlined development with full control

Complexity of Use Cases

Simple FAQs, basic automation, routing

Complex reasoning, multi-agent systems, RAG over sensitive data

From simple Q&A to sophisticated enterprise AI

Governance & Control

Power Platform admin, basic ALM

Enterprise-grade security, compliance, isolation, detailed logging

User-friendly governance for agents, strict control for core AI

Cost Optimization

Efficient for lightweight tasks

Optimized for complex, scalable inference

Balancing efficiency for simple tasks with robust processing for complex ones

Getting Started with Building Custom Copilots

If you're exploring how to begin your journey with custom copilots, things should be starting to click. As someone deeply involved in learning experiences, I’ve seen firsthand that customers learn best by doing. So, to help you dive in, I recommend starting with these hands-on Microsoft Learn tutorials:

Copilot Studio:
  • Create and deploy an agent - Learn how to build and deploy an agent using Copilot Studio. This tutorial walks you through adding knowledge, testing content updates in real-time, and deploying your agent to a test page: Link to tutorial.
  • Building agents with generative AI - Discover how to create agents powered by generative AI. This module outlines key features and prerequisites to get you started: Link to tutorial.
  • Create and publish agents - Explore how to design agents tailored to real business scenarios—ones that both customers and employees can interact with: Link to tutorial.
Azure AI Foundry:
  • Build a basic chat app in Python - Set up your local dev environment with the Azure AI Foundry SDK, write prompts, run your app code, trace LLM calls, and perform basic evaluations: Link to tutorial.
  • Use the chat playground - This QuickStart shows you how to deploy a chat model and experiment with it in the Azure AI Foundry portal’s playground: Link to tutorial.
  • Azure AI Foundry documentation - Dive into the full documentation to learn how developers and organizations can rapidly build intelligent apps using prebuilt and customizable APIs and models: Link to tutorial.

Conclusion

Ultimately, the choice between Copilot Studio and Azure AI Foundry, or the decision to use both, hinges on the specific needs, technical capabilities, and strategic objectives of an organization. Copilot Studio offers an accessible entry point into AI, enabling rapid development of conversational agents for everyday business scenarios. Azure AI Foundry provides the deep control and comprehensive toolkit necessary for building complex, scalable, and highly customized AI solutions for the enterprise. The most forward-thinking approach for many organizations will be a hybrid one, leveraging Copilot Studio for agile, user-facing interactions and entrusting Azure AI Foundry with the heavy lifting of advanced AI model management and data processing. This synergistic model allows businesses to achieve both speed and scale, delivering powerful AI experiences while maintaining stringent control and compliance.

Read the whole story
alvinashcraft
29 seconds ago
reply
Pennsylvania, USA
Share this story
Delete

Welcome to the Microsoft Security Community!

1 Share

Protect it all with Microsoft Security 

Eliminate gaps and get the simplified, comprehensive protection, expertise, and AI-powered solutions you need to innovate and grow in a changing world. The Microsoft Security Community is your gateway to connect, learn, and collaborate with peers, experts, and product teams. Gain access to technical discussions, webinars, and help shape Microsoft’s security products. 

Get there fast 

Index
Community Calls: December 2025 | January 2026 | February 2026 

Upcoming Community Calls 

December 2025 

Dec. 2 | 9:00am | Microsoft Sentinel and Microsoft Defender XDR | Empowering the Modern SOC 

Microsoft is simplifying the SecOps experience and delivering innovation that will allow your team to scale in new ways. Join us for actionable learnings to help your team modernize your operations and enhance protection of your organization. 

Dec. 3 | 8:00am | Microsoft Defender for Identity | Identity Centric Protection in the Cloud Era 

Safeguarding identities is challenging, but Microsoft Defender for Identity offers enhanced visibility, security posture, and protection focused on identity. 

Dec. 4 | 8:00am | Microsoft Defender for Cloud | Unlocking New Capabilities in Defender for Storage 

Discover the latest Microsoft Defender for Storage updates! Explore public preview features: Cloud Storage Aggregated Events and Automated Malware Remediation for Malicious Blobs, with live demos and best practices. 

Dec. 4 | 8:00am | Security Copilot Skilling Series Discussion of Ignite Announcements 

Get ready for an info-packed session highlighting the latest Security Copilot breakthroughs from Ignite! Discover how powerful agents and Copilot’s seamless integration with Intune, Entra, Purview, and Defender combine to deliver unbeatable, all-around protection. 

Dec. 4 | 9:00am | Microsoft Sentinel | What’s New in the Past 6 Months 

Learn what’s new in Microsoft Sentinel! See deeper Defender integration, evolving data lake capabilities for scalable security, plus demos and real-world use cases to help you stay ahead. 

Dec. 8 | 9:00am | Microsoft Security Store | Security, Simplified: A look inside the Security Store 

Welcome to Microsoft Security Store! During this session, you’ll learn all about this centralized destination where customers can discover, deploy, and manage trusted security solutions built to extend Microsoft’s security platforms like Defender, Sentinel, Entra, Purview, and Intune. 

Dec. 9 | 8:00am | Microsoft Defender XDR | A Deep Dive into Automated Attack Disruption 

Learn what’s new in Microsoft Sentinel! See deeper Defender integration, evolving data lake capabilities for scalable security, plus demos and real-world use cases to help you stay ahead. 

Dec. 9 | 9:00am | Microsoft Sentinel | Part 1: Stop Waiting, Start Onboarding: Get Sentinel Defender-Ready Today 

The Microsoft Sentinel portal retires July 2026—explore the Defender unified portal! Learn to manage incidents in a unified queue, enrich investigations with UEBA and Threat Intelligence, and leverage automation and dashboards for smarter SOC operations. 

Dec. 10 | 8:00am | Azure Network Security | Deep Dive into Azure DDoS Protection 

Explore Azure DDoS Protection! Learn to secure apps and infrastructure with end-to-end architecture, detection and mitigation flow, telemetry, analytics, and seamless integration for visibility and protection. 

Dec. 10 | 9:00am | Microsoft Defender for Cloud | Expose Less, Protect More with Microsoft Security Exposure Management  

Join us for an in-depth look at how Microsoft Security Exposure Management helps organizations reduce risk by identifying and prioritizing exposures before attackers can exploit them. Learn practical strategies to minimize your attack surface, strengthen defenses, and protect what matters most. 

Dec. 11 | 8:00am | Microsoft Defender for Cloud | Modernizing Cloud Security with Next Generation Microsoft Defender for Cloud 

Discover how Microsoft Defender for Cloud simplifies multi-cloud security. Learn to streamline posture management and threat protection across Azure, AWS, and GCP, improving efficiency, reducing risk, and enabling smarter prioritization. 

Dec. 11 | 9:00am | Microsoft Sentinel data lake | Transforming data collection for AI-ready security operations with Microsoft Sentinel 

See how Microsoft Sentinel transforms multi-cloud/multiplatform data collection. Learn a unified, cloud-native approach; ingest from on-prem, Microsoft workloads, and multicloud via codeless connectors (350+; App Assure), plus the roadmap for scaling to AI driven SecOps. 

Dec. 15 | 9:00am | Microsoft Entra | Diving into the New Microsoft Entra Agent ID

Join our first session in the Microsoft Entra Agent ID series to learn why agent identity matters, explore core concepts, and see how it fits into Microsoft’s identity ecosystem. Perfect for developers and product owners building AI agents.

Dec. 16 | 8:00am | Microsoft Defender for Office 365 | Ask the Experts: Tips and Tricks 

Engage in this interactive panel with Microsoft MVPs! Get answers to real-world Defender for Office 365 scenarios, best practices, and tips on migration, SOC optimization, Teams protection, and more. Bring your toughest questions for the live discussion. 

Dec. 16 | 9:00am | Microsoft Sentinel | Part 2: Don’t Get Left Behind: Complete Your Sentinel Move to Defender 

Prepare for the July 2026 transition! Unlock Microsoft Defender’s full potential with data onboarding, retention, governance, Content Hub, analytic rules, MTO for simplified management, and Security Copilot for AI-driven insights. 

January 2026 

Jan.13 | 9:00am | Microsoft Sentinel | AI-Powered Entity Analysis in Sentinel’s MCP Server 

Simplify entity risk assessment with Entity Analyzer. Eliminate complex playbooks; get unified, AI-driven analysis using Sentinel’s semantic understanding. Accelerate automation and enrich SOAR workflows with native Logic Apps integration. 

Jan. 20 | 8:00am | Microsoft Defender for Cloud | What’s New in Microsoft Defender CSPM 

Cloud security posture management (CSPM) continues to evolve, and Microsoft Defender CSPM is leading the way with powerful enhancements introduced at Microsoft Ignite. This session will showcase the latest innovations designed to help security teams strengthen their posture and streamline operations. 

Jan. 22 | 8:00am | Azure Network Security | Advancing web application Protection with Azure WAF: Ruleset and Security Enhancements 

Explore the latest Azure WAF ruleset and security enhancements. Learn to fine-tune configurations, reduce false positives, gain threat visibility, and ensure consistent protection for web workloads—whether starting fresh or optimizing deployments. 

Looking for more? 

Join the Microsoft Customer Connection Program (MCCP)! As a MCCP member, you’ll gain early visibility into product roadmaps, participate in focus groups, and access private preview features before public release. You’ll have a direct channel to share feedback with engineering teams, influencing the direction of Microsoft Security products. The program also offers opportunities to collaborate and network with fellow security experts and Microsoft product teams. Join the MCCP that best fits your interests: www.aka.ms/joincommunity. 

Additional resources 


Read the whole story
alvinashcraft
41 seconds ago
reply
Pennsylvania, USA
Share this story
Delete

Hybrid AI Using Foundry Local, Microsoft Foundry and the Agent Framework - Part 2

1 Share

Background

In Part 1, we explored how a local LLM running entirely on your GPU can call out to the cloud for advanced capabilities The theme was: Keep your data local. Pull intelligence in only when necessary. That was local-first AI calling cloud agents as needed.

This time, the cloud is in charge, and the user interacts with a Microsoft Foundry hosted agent — but whenever it needs private, sensitive, or user-specific information, it securely “calls back home” to a local agent running next to the user via MCP.

Think of it as:

  • The cloud agent = specialist doctor
  • The local agent = your health coach who you trust and who knows your medical history
  • The cloud never sees your raw medical history
  • The local agent only shares the minimum amount of information needed to support the cloud agent reasoning

This hybrid intelligence pattern respects privacy while still benefiting from hosted frontier-level reasoning.

Disclaimer:
The diagnostic results, symptom checker, and any medical guidance provided in this article are for illustrative and informational purposes only. They are not intended to provide medical advice, diagnosis, or treatment.

Architecture Overview

The diagram illustrates a hybrid AI workflow where a Microsoft Foundry–hosted agent in Azure works together with a local MCP server running on the user’s machine. The cloud agent receives user symptoms and uses a frontier model (GPT-4.1) for reasoning, but when it needs personal context—like medical history—it securely calls back into the local MCP Health Coach via a dev-tunnel. The local MCP server queries a local GPU-accelerated LLM (Phi-4-mini via Foundry Local) along with stored health-history JSON, returning only the minimal structured background the cloud model needs. The cloud agent then combines both pieces—its own reasoning plus the local context—to produce tailored recommendations, all while sensitive data stays fully on the user’s device.

Hosting the agent in Microsoft Foundry on Azure provides a reliable, scalable orchestration layer that integrates directly with Azure identity, monitoring, and governance. It lets you keep your logic, policies, and reasoning engine in the cloud, while still delegating private or resource-intensive tasks to your local environment. This gives you the best of both worlds: enterprise-grade control and flexibility with edge-level privacy and efficiency.

Demo Setup

Create the Cloud Hosted Agent

Using Microsoft Foundry, I created an agent in the UI and pick gpt-4.1 as model:

I provided rigorous instructions as system prompt:

You are a medical-specialist reasoning assistant for non-emergency triage.  
You do NOT have access to the patient’s identity or private medical history.  
A privacy firewall limits what you can see.

A local “Personal Health Coach” LLM exists on the user’s device.  
It holds the patient’s full medical history privately.

You may request information from this local model ONLY by calling the MCP tool:
   get_patient_background(symptoms)

This tool returns a privacy-safe, PII-free medical summary, including:
- chronic conditions  
- allergies  
- medications  
- relevant risk factors  
- relevant recent labs  
- family history relevance  
- age group  

Rules:
1. When symptoms are provided, ALWAYS call get_patient_background BEFORE reasoning.
2. NEVER guess or invent medical history — always retrieve it from the local tool.
3. NEVER ask the user for sensitive personal details. The local model handles that.
4. After the tool runs, combine:
      (a) the patient_background output  
      (b) the user’s reported symptoms  
   to deliver high-level triage guidance.
5. Do not diagnose or prescribe medication.
6. Always end with: “This is not medical advice.”

You MUST display the section “Local Health Coach Summary:” containing the JSON returned from the tool before giving your reasoning.

Build the Local MCP Server (Local LLM + Personal Medical Memory)

The full code for the MCP server is available here but here are the main parts:

HTTP JSON-RPC Wrapper (“MCP Gateway”)

The first part of the server exposes a minimal HTTP API that accepts MCP-style JSON-RPC messages and routes them to handler functions:

  • Listens on a local port
  • Accepts POST JSON-RPC
  • Normalizes the payload
  • Passes requests to handle_mcp_request()
  • Returns JSON-RPC responses
  • Exposes initialize and tools/list
class MCPHandler(BaseHTTPRequestHandler): def _set_headers(self, status=200): self.send_response(status) self.send_header("Content-Type", "application/json") self.end_headers() def do_GET(self): self._set_headers() self.wfile.write(b"OK") def do_POST(self): content_len = int(self.headers.get("Content-Length", 0)) raw = self.rfile.read(content_len) print("---- RAW BODY ----") print(raw) print("-------------------") try: req = json.loads(raw.decode("utf-8")) except: self._set_headers(400) self.wfile.write(b'{"error":"Invalid JSON"}') return resp = handle_mcp_request(req) self._set_headers() self.wfile.write(json.dumps(resp).encode("utf-8"))

Tool Definition: get_patient_background

This section defines the tool contract exposed to Azure AI Foundry. The hosted agent sees this tool exactly as if it were a cloud function:

  • Advertises the tool via tools/list
  • Accepts arguments passed from the cloud agent
  • Delegates local reasoning to the GPU LLM
  • Returns structured JSON back to the cloud
def handle_mcp_request(req): method = req.get("method") req_id = req.get("id") if method == "tools/list": return { "jsonrpc": "2.0", "id": req_id, "result": { "tools": [ { "name": "get_patient_background", "description": "Returns anonymized personal medical context using your local LLM.", "inputSchema": { "type": "object", "properties": { "symptoms": {"type": "string"} }, "required": ["symptoms"] } } ] } } if method == "tools/call": tool = req["params"]["name"] args = req["params"]["arguments"] if tool == "get_patient_background": symptoms = args.get("symptoms", "") summary = summarize_patient_locally(symptoms) return { "jsonrpc": "2.0", "id": req_id, "result": { "content": [ { "type": "text", "text": json.dumps(summary) } ] } }

Local GPU LLM Caller (Foundry Local Integration)

This is where personalization happens — entirely on your machine, not in the cloud:

  • Calls the local GPU LLM through Foundry Local
  • Injects private medical data (loaded from a file or memory)
  • Produces anonymized structured outputs
  • Logs debug info so you can see when local inference is running
FOUNDRY_LOCAL_BASE_URL = "http://127.0.0.1:52403" FOUNDRY_LOCAL_CHAT_URL = f"{FOUNDRY_LOCAL_BASE_URL}/v1/chat/completions" FOUNDRY_LOCAL_MODEL_ID = "Phi-4-mini-instruct-cuda-gpu:5" def summarize_patient_locally(symptoms: str): print("[LOCAL] Calling Foundry Local GPU model...") payload = { "model": FOUNDRY_LOCAL_MODEL_ID, "messages": [ {"role": "system", "content": PERSONAL_SYSTEM_PROMPT}, {"role": "user", "content": symptoms} ], "max_tokens": 300, "temperature": 0.1 } resp = requests.post( FOUNDRY_LOCAL_CHAT_URL, headers={"Content-Type": "application/json"}, data=json.dumps(payload), timeout=60 ) llm_content = resp.json()["choices"][0]["message"]["content"] print("[LOCAL] Raw content:\n", llm_content) cleaned = _strip_code_fences(llm_content) return json.loads(cleaned)

Start a Dev Tunnel

Now we need to do some plumbing work to make sure the cloud can resolve the MCP endpoint. I used Azure Dev Tunnels for this demo.

The snippet below shows how to set that up in 4 PowerShell commands:

PS C:\Windows\system32> winget install Microsoft.DevTunnel PS C:\Windows\system32> devtunnel create mcp-health PS C:\Windows\system32> devtunnel port create mcp-health -p 8081 --protocol http PS C:\Windows\system32> devtunnel host mcp-health

I have now a public endpoint: 

https://xxxxxxxxx.devtunnels.ms:8081

Wire Everything Together in Azure AI Foundry

Now let's us the UI to add a new custom tool as MCP for our agent:

And point to the public endpoint created previously:

Voila, we're done with the setup, let's test it

Demo: The Cloud Agent Talks to Your Local Private LLM

I am going to use a simple prompt in the agent: “Hi, I’ve been feeling feverish, fatigued, and a bit short of breath since yesterday. Should I be worried?”

Disclaimer:
The diagnostic results and any medical guidance provided in this article are for illustrative and informational purposes only. They are not intended to provide medical advice, diagnosis, or treatment.

Below is the sequence shown in real time:

Conclusion — Why This Hybrid Pattern Matters

Hybrid AI lets you place intelligence exactly where it belongs: high-value reasoning in the cloud, sensitive or contextual data on the local machine. This protects privacy while reducing cloud compute costs—routine lookups, context gathering, and personal history retrieval can all run on lightweight local models instead of expensive frontier models.

This pattern also unlocks powerful real-world applications: local financial data paired with cloud financial analysis, on-device coding knowledge combined with cloud-scale refactoring, or local corporate context augmenting cloud automation agents. In industrial and edge environments, local agents can sit directly next to the action—embedded in factory sensors, cameras, kiosks, or ambient IoT devices—providing instant, private intelligence while the cloud handles complex decision-making.

Hybrid AI turns every device into an intelligent collaborator, and every cloud agent into a specialist that can safely leverage local expertise.

References


Full demo repo available here.

Read the whole story
alvinashcraft
55 seconds ago
reply
Pennsylvania, USA
Share this story
Delete

Gaining Confidence with Az CLI and Az PowerShell: Introducing What if & Export Bicep

1 Share

Ever hesitated before hitting Enter on a command, wondering what changes it might make? You’re not alone. Whether you’re deploying resources or updating configurations, the fear of unintended consequences can slow you down. That’s why we’re introducing new powerful features in Azure CLI and Azure PowerShell to preview the changes the commands may make: the What if and Export Bicep features.

These capabilities allow you to preview the impact of your commands and allow you to export them as Bicep templates, all before making any changes to your Azure environment. Think of them as your safety net: you can validate actions, confirm resource changes, and even generate reusable infrastructure-as-code templates with confidence.

Currently, these features are in private preview, and we’re excited to share how you can get early access.

Why This Matters
  • Reduce risk: Avoid accidental resource deletions or costly misconfigurations.
  • Build confidence: Understand exactly what your command will do before execution.
  • Accelerate adoption of IaC: Convert CLI commands into Bicep templates automatically.
  • Improve productivity: Validate scripts quickly without trial-and-error deployments.

How It Works

What if preview of commands

All you have to do is add the `--what-if` parameter to Azure CLI commands and then the `-DryRun` command to Azure PowerShell commands like below.

Azure CLI:

az storage account create --name "mystorageaccount" --resource-group "myResourceGroup" --location "eastus" --what-if

Azure PowerShell:

New-AzVirtualNetwork -name MyVNET -ResourceGroupName MyResourceGroup -Location eastus -AddressPrefix "10.0.0.0/16" -DryRun
Exporting commands to Bicep

To generate bicep from the command you will have to add the `--export-bicep` command with the --what-if parameter to generate a bicep file. The bicep code will be saved under the `~/.azure/whatif` directory on your machine. The command will specific exactly where the file is saved on your machine.

Behind the scenes, AI translates your CLI command into Bicep code, creating a reusable template for future deployments. After generating the Bicep file, the CLI automatically runs a What-If analysis on the Bicep template to show you the expected changes before applying them.

Here is a video of it in action!

Here is another example where there is delete, modify and create actions happening all together.

Private Preview Access

These features are available in private preview. To sign up:

  1. Visit the aka.ms/PreviewSignupPSCLI
  2. Submit your request for access.
  3. Once approved, you’ll receive instructions to download the preview package.

Supported Commands (Private Preview)

Given these features are in a preview we have only added support for a small set of commands for the time being. Here’s a list of commands that will support these features during the private preview:

Azure CLI

  • Az vm create
  • Az vm update
  • az storage account create
  • az storage container create
  • az storage share create
  • az network vnet create
  • az network vnet update
  • az storage account network-rule add
  • az vm disk attach
  • az vm disk detach
  • az vm nic remove

Azure PowerShell

  • New-AzVM
  • Update-AzVM
  • New-AzStorageAccount
  • New-AzRmStorageShare
  • New-AzRmStorageContainer
  • New-AzVirtualNetwork
  • Set-AzVirtualNetwork
  • Add-AzStorageAccountNetworkRule

Next Steps

  • Sign up for the private preview.
  • Install the packages using the upcoming script.
  • Start using --what-if, -DryRun, and --export-bicep to make safer, smarter decisions and accelerate your IaC journey.
  • Give us feedback on what you think of the feature! At https://aka.ms/PreviewFeedbackWhatIf

Thanks so much!


Steven Bucher

PM for Azure Client Tools


Read the whole story
alvinashcraft
1 minute ago
reply
Pennsylvania, USA
Share this story
Delete
Next Page of Stories