Sr. Content Developer at Microsoft, working remotely in PA, TechBash conference organizer, former Microsoft MVP, Husband, Dad and Geek.
148558 stories
·
33 followers

Smashing Animations Part 6: Magnificent SVGs With `` And CSS Custom Properties

1 Share

I explained recently how I use <symbol>, <use>, and CSS Media Queries to develop what I call adaptive SVGs. Symbols let us define an element once and then use it again and again, making SVG animations easier to maintain, more efficient, and lightweight.

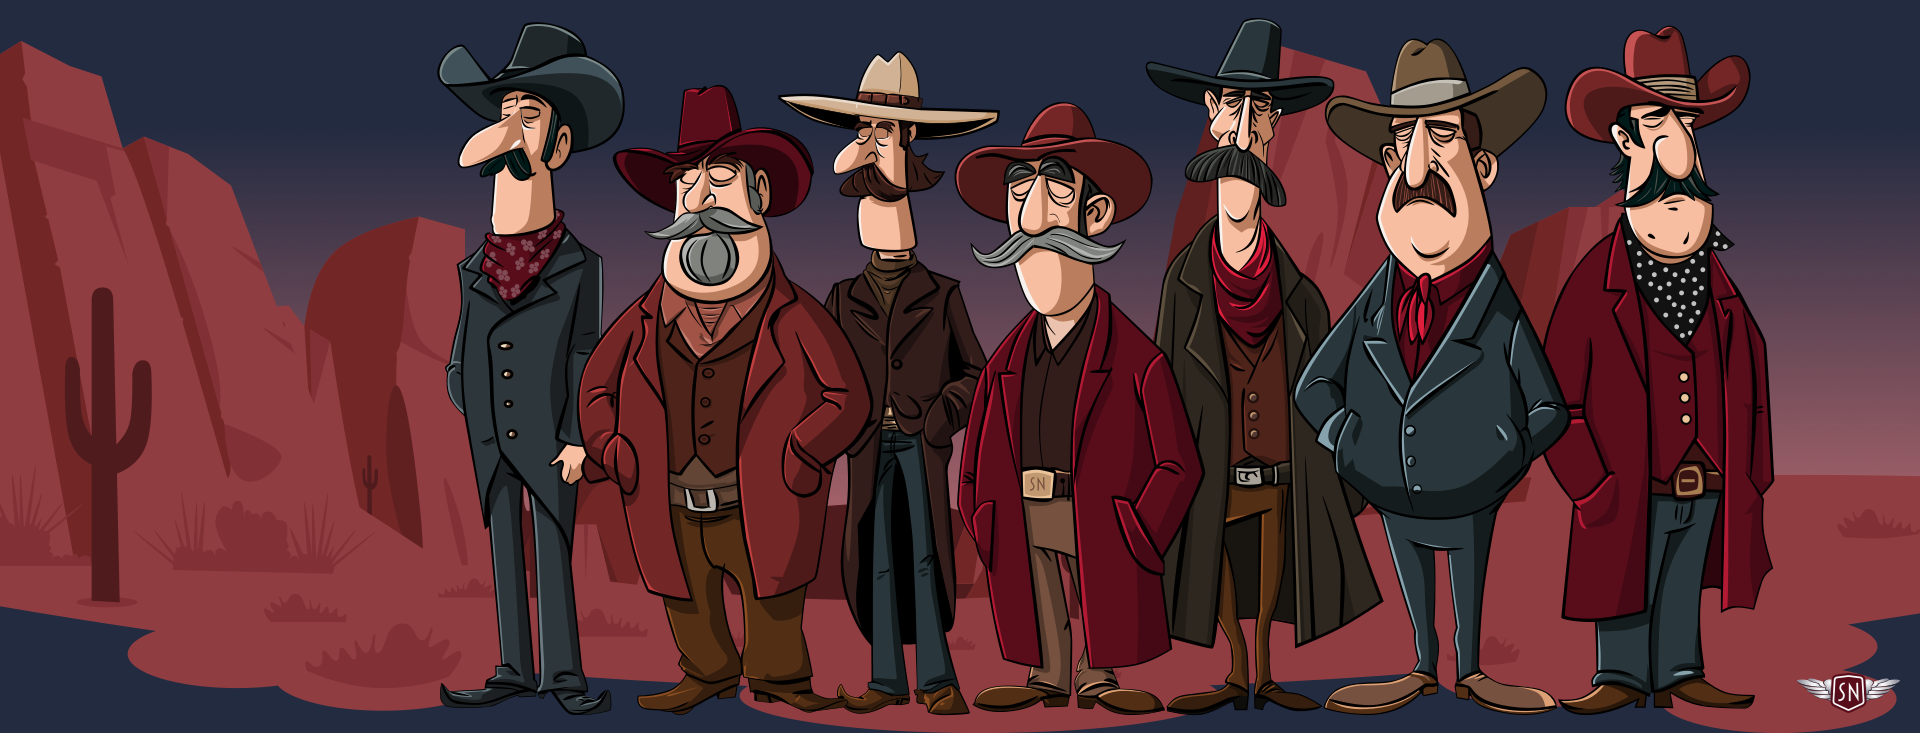
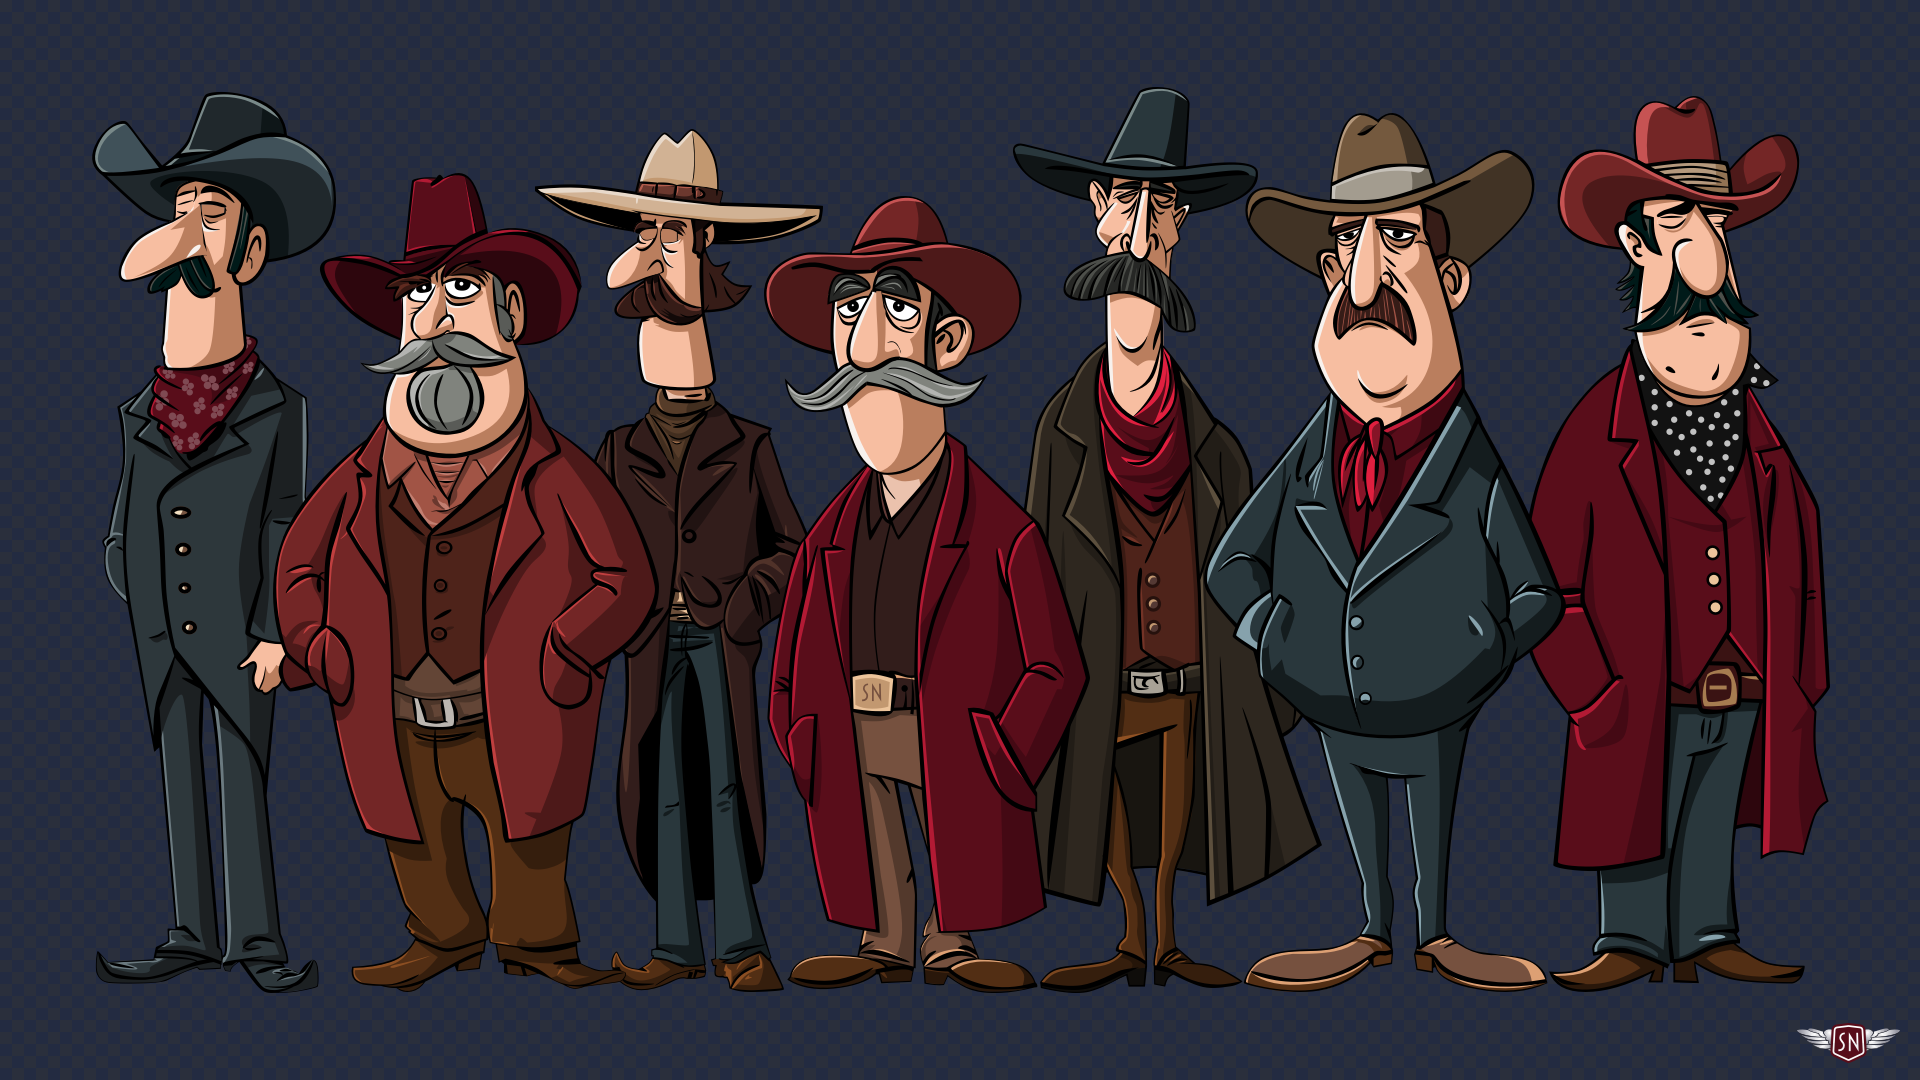
Since I wrote that explanation, I’ve designed and implemented new Magnificent 7 animated graphics across my website. They play on the web design pioneer theme, featuring seven magnificent Old West characters.

<symbol> and <use> let me define a character design and reuse it across multiple SVGs and pages. First, I created my characters and put each into a <symbol> inside a hidden library SVG:

<!-- Symbols library -->
<svg xmlns="http://www.w3.org/2000/svg" style="display:none;">
 <symbol id="outlaw-1">[...]</symbol>
 <symbol id="outlaw-2">[...]</symbol>
 <symbol id="outlaw-3">[...]</symbol>
 <!-- etc. -->
</svg>

Then, I referenced those symbols in two other SVGs, one for large and the other for small screens:

<!-- Large screens -->
<svg xmlns="http://www.w3.org/2000/svg" id="svg-large">
 <use href="outlaw-1" />
 <!-- ... -->
</svg>

<!-- Small screens -->
<svg xmlns="http://www.w3.org/2000/svg" id="svg-small">
 <use href="outlaw-1" />
 <!-- ... -->
</svg>

Elegant. But then came the infuriating. I could reuse the characters, but couldn’t animate or style them. I added CSS rules targeting elements within the symbols referenced by a <use>, but nothing happened. Colours stayed the same, and things that should move stayed static. It felt like I’d run into an invisible barrier, and I had.

Understanding The Shadow DOM Barrier

When you reference the contents of a symbol with use, a browser creates a copy of it in the Shadow DOM. Each <use> instance becomes its own encapsulated copy of the referenced <symbol>, meaning that CSS from outside can’t break through the barrier to style any elements directly. For example, in normal circumstances, this tapping value triggers a CSS animation:

<g class="outlaw-1-foot tapping">
 <!-- ... -->
</g>
.tapping {
  animation: tapping 1s ease-in-out infinite;
}

But when the same animation is applied to a <use> instance of that same foot, nothing happens:

<symbol id="outlaw-1">
 <g class="outlaw-1-foot"><!-- ... --></g>
</symbol>

<use href="#outlaw-1" class="tapping" />
.tapping {
  animation: tapping 1s ease-in-out infinite;
}

That’s because the <g> inside the <symbol> element is in a protected shadow tree, and the CSS Cascade stops dead at the <use> boundary. This behaviour can be frustrating, but it’s intentional as it ensures that reused symbol content stays consistent and predictable.

While learning how to develop adaptive SVGs, I found all kinds of attempts to work around this behaviour, but most of them sacrificed the reusability that makes SVG so elegant. I didn’t want to duplicate my characters just to make them blink at different times. I wanted a single <symbol> with instances that have their own timings and expressions.

CSS Custom Properties To The Rescue

While working on my pioneer animations, I learned that regular CSS values can’t cross the boundary into the Shadow DOM, but CSS Custom Properties can. And even though you can’t directly style elements inside a <symbol>, you can pass custom property values to them. So, when you insert custom properties into an inline style, a browser looks at the cascade, and those styles become available to elements inside the <symbol> being referenced.

I added rotate to an inline style applied to the <symbol> content:

<symbol id="outlaw-1">
  <g class="outlaw-1-foot" style="
    transform-origin: bottom right; 
    transform-box: fill-box; 
    transform: rotate(var(--foot-rotate));">
    <!-- ... -->
  </g>
</symbol>

Then, defined the foot tapping animation and applied it to the element:

@keyframes tapping {
  0%, 60%, 100% { --foot-rotate: 0deg; }
  20% { --foot-rotate: -5deg; }
  40% { --foot-rotate: 2deg; }
}

use[data-outlaw="1"] {
  --foot-rotate: 0deg;
  animation: tapping 1s ease-in-out infinite;
}
Passing Multiple Values To A Symbol

Once I’ve set up a symbol to use CSS Custom Properties, I can pass as many values as I want to any <use> instance. For example, I might define variables for fill, opacity, or transform. What’s elegant is that each <symbol> instance can then have its own set of values.

<g class="eyelids" style="
  fill: var(--eyelids-colour, #f7bea1);
  opacity: var(--eyelids-opacity, 1);
  transform: var(--eyelids-scale, 0);"
>
  <!-- etc. -->
</g>
use[data-outlaw="1"] {
  --eyelids-colour: #f7bea1; 
  --eyelids-opacity: 1;
}

use[data-outlaw="2"] {
  --eyelids-colour: #ba7e5e; 
  --eyelids-opacity: 0;
}

Support for passing CSS Custom Properties like this is solid, and every contemporary browser handles this behaviour correctly. Let me show you a few ways I’ve been using this technique, starting with a multi-coloured icon system.

A Multi-Coloured Icon System

When I need to maintain a set of icons, I can define an icon once inside a <symbol> and then use custom properties to apply colours and effects. Instead of needing to duplicate SVGs for every theme, each use can carry its own values.

For example, I applied an --icon-fill custom property for the default fill colour of the <path> in this Bluesky icon :

<symbol id="icon-bluesky">
  <path fill="var(--icon-fill, currentColor)" d="..." />
</symbol>

Then, whenever I need to vary how that icon looks — for example, in a <header> and <footer> — I can pass new fill colour values to each instance:

<header>
  <svg xmlns="http://www.w3.org/2000/svg">
    <use href="#icon-bluesky" style="--icon-fill: #2d373b;" />
  </svg>
</header>

<footer>
  <svg xmlns="http://www.w3.org/2000/svg">
    <use href="#icon-bluesky" style="--icon-fill: #590d1a;" />
  </svg>
</footer>

These icons are the same shape but look different thanks to their inline styles.

Data Visualisations With CSS Custom Properties

We can use <symbol> and <use> in plenty more practical ways. They’re also helpful for creating lightweight data visualisations, so imagine an infographic about three famous Wild West sheriffs: Wyatt Earp, Pat Garrett, and Bat Masterson.

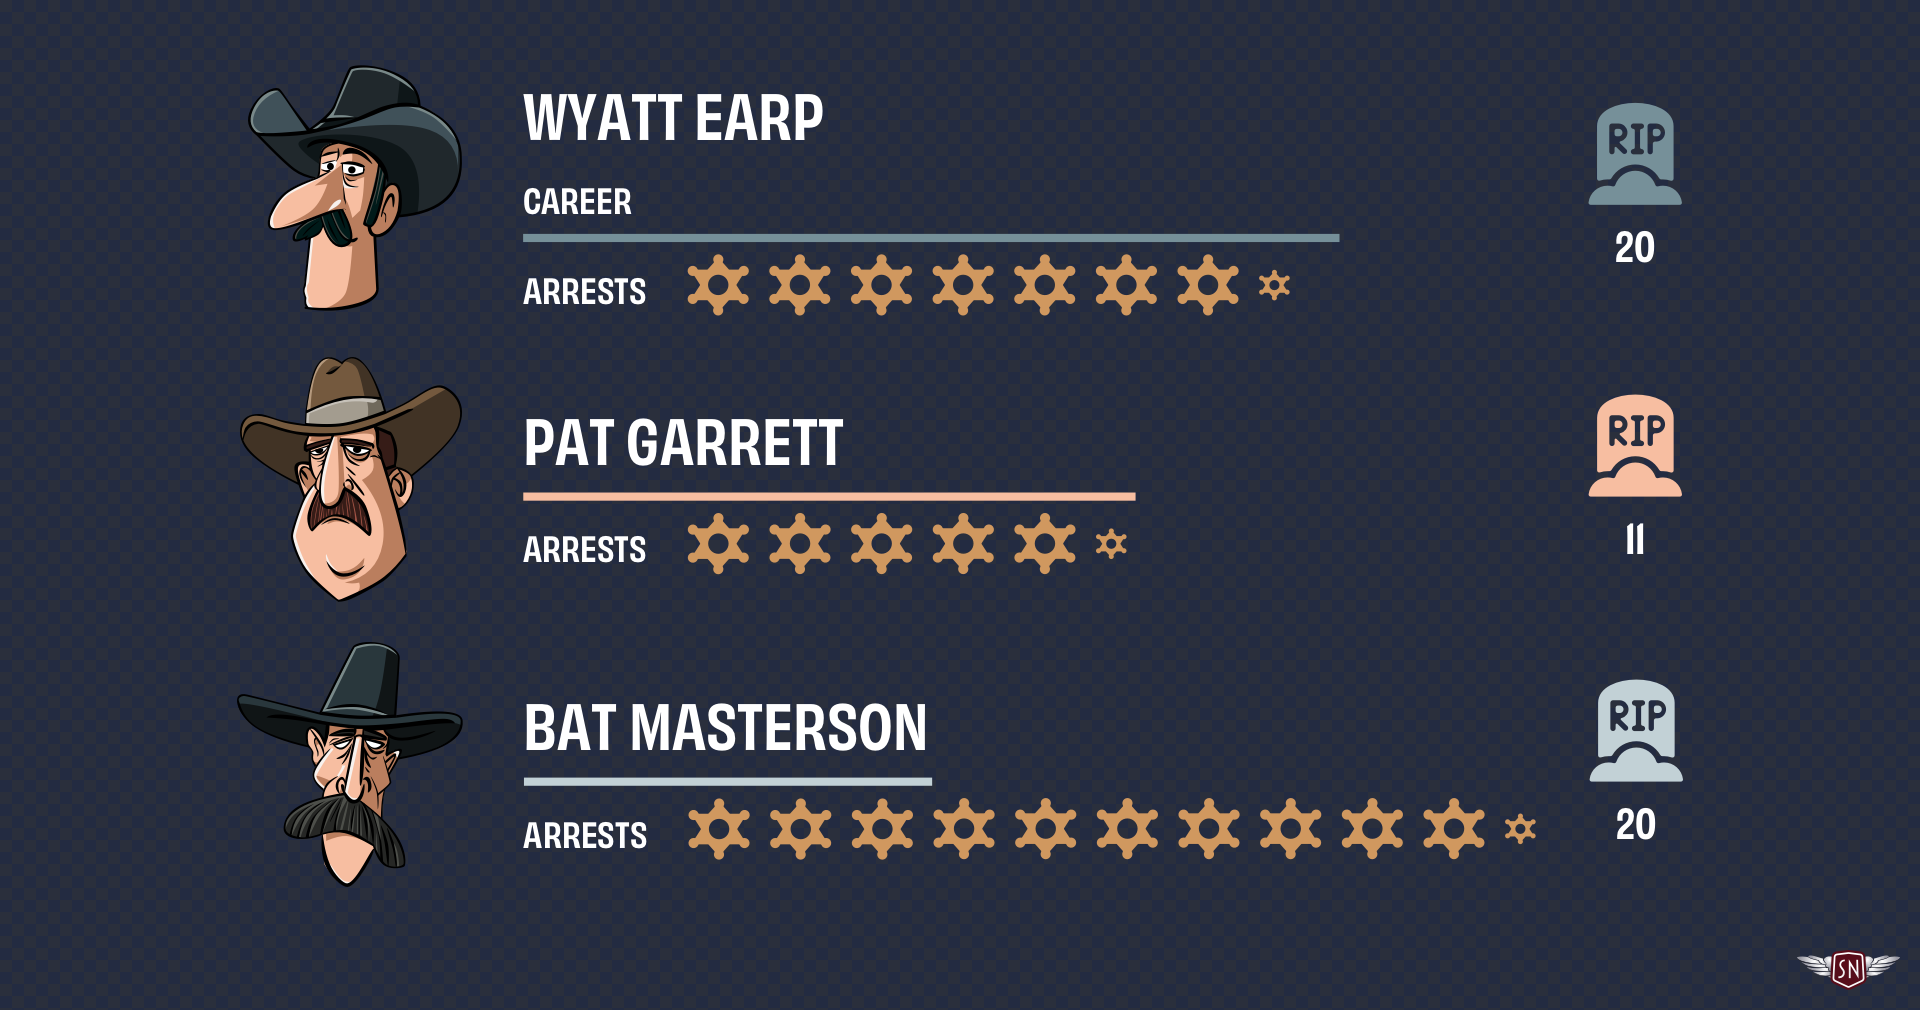
Each sheriff’s profile uses the same set of SVG three symbols: one for a bar representing the length of a sheriff’s career, another to represent the number of arrests made, and one more for the number of kills. Passing custom property values to each <use> instance can vary the bar lengths, arrests scale, and kills colour without duplicating SVGs. I first created symbols for those items:

<svg xmlns="http://www.w3.org/2000/svg" style="display:none;">
  <symbol id="career-bar">
    <rect
      height="10"
      width="var(--career-length, 100)" 
      fill="var(--career-colour, #f7bea1)"
    />
  </symbol>

  <symbol id="arrests-badge">
    <path 
      fill="var(--arrest-color, #d0985f)" 
      transform="scale(var(--arrest-scale, 1))"
    />
  </symbol>

  <symbol id="kills-icon">
    <path fill="var(--kill-colour, #769099)" />
  </symbol>
</svg>

Each symbol accepts one or more values:

  • --career-length adjusts the width of the career bar.
  • --career-colour changes the fill colour of that bar.
  • --arrest-scale controls the arrest badge size.
  • --kill-colour defines the fill colour of the kill icon.

I can use these to develop a profile of each sheriff using <use> elements with different inline styles, starting with Wyatt Earp.

<svg xmlns="http://www.w3.org/2000/svg">
  <g id="wyatt-earp">
    <use href="#career-bar" style="--career-length: 400; --career-color: #769099;"/>
    <use href="#arrests-badge" style="--arrest-scale: 2;" />
    <!-- ... -->
    <use href="#arrests-badge" style="--arrest-scale: 2;" />
    <use href="#arrests-badge" style="--arrest-scale: 1;" />
    <use href="#kills-icon" style="--kill-color: #769099;" />
  </g>

  <g id="pat-garrett">
    <use href="#career-bar" style="--career-length: 300; --career-color: #f7bea1;"/>
    <use href="#arrests-badge" style="--arrest-scale: 2;" />
    <!-- ... -->
    <use href="#arrests-badge" style="--arrest-scale: 2;" />
    <use href="#arrests-badge" style="--arrest-scale: 1;" />
    <use href="#kills-icon" style="--kill-color: #f7bea1;" />
  </g>

  <g id="bat-masterson">
    <use href="#career-bar" style="--career-length: 200; --career-color: #c2d1d6;"/>
    <use href="#arrests-badge" style="--arrest-scale: 2;" />
    <!-- ... -->
    <use href="#arrests-badge" style="--arrest-scale: 2;" />
    <use href="#arrests-badge" style="--arrest-scale: 1;" />
    <use href="#kills-icon" style="--kill-color: #c2d1d6;" />
  </g>
</svg>

Each <use> shares the same symbol elements, but the inline variables change their colours and sizes. I can even animate those values to highlight their differences:

@keyframes pulse {
  0%, 100% { --arrest-scale: 1; }
  50% { --arrest-scale: 1.2; }
}

use[href="#arrests-badge"]:hover {
  animation: pulse 1s ease-in-out infinite;
}

CSS Custom Properties aren’t only helpful for styling; they can also channel data between HTML and SVG’s inner geometry, binding visual attributes like colour, length, and scale to semantics like arrest numbers, career length, and kills.

Ambient Animations

I started learning to animate elements within symbols while creating the animated graphics for my website’s Magnificent 7. To reduce complexity and make my code lighter and more maintainable, I needed to define each character once and reuse it across SVGs:

<!-- Symbols library -->
<svg xmlns="http://www.w3.org/2000/svg" style="display:none;">
  <symbol id="outlaw-1">[…]</symbol>
  <!-- ... -->
</svg>

<!-- Large screens -->
<svg xmlns="http://www.w3.org/2000/svg" id="svg-large">
  <use href="outlaw-1" />
  <!-- ... -->
</svg>

<!-- Small screens -->
<svg xmlns="http://www.w3.org/2000/svg" id="svg-small">
  <use href="outlaw-1" />
  <!-- ... -->
</svg>

But I didn’t want those characters to stay static; I needed subtle movements that would bring them to life. I wanted their eyes to blink, their feet to tap, and their moustache whiskers to twitch. So, to animate these details, I pass animation data to elements inside those symbols using CSS Custom Properties, starting with the blinking.

I implemented the blinking effect by placing an SVG group over the outlaws’ eyes and then changing its opacity.

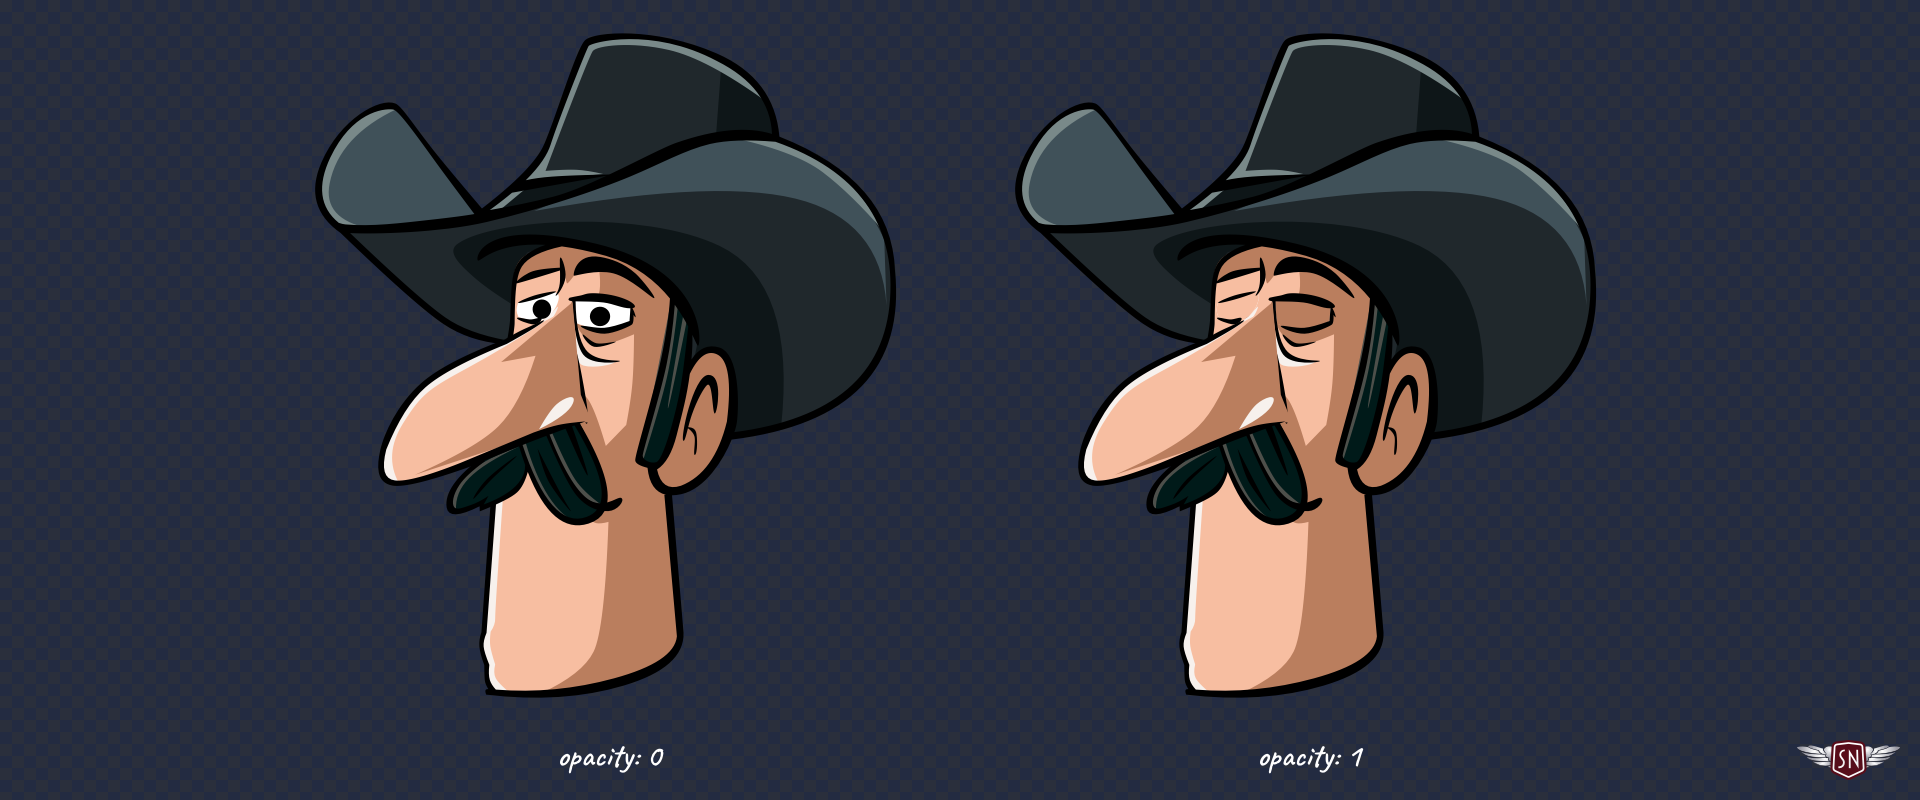
To make this possible, I added an inline style with a CSS Custom Property to the group:

<symbol id="outlaw-1" viewBox="0 0 712 2552">
 <g class="eyelids" style="opacity: var(--eyelids-opacity, 1);">
    <!-- ... -->
  </g>
</symbol>

Then, I defined the blinking animation by changing --eyelids-opacity:

@keyframes blink {
  0%, 92% { --eyelids-opacity: 0; }
  93%, 94% { --eyelids-opacity: 1; }
  95%, 97% { --eyelids-opacity: 0.1; }
  98%, 100% { --eyelids-opacity: 0; }
}

…and applied it to every character:

use[data-outlaw] {
  --blink-duration: 4s;
  --eyelids-opacity: 1;
  animation: blink var(--blink-duration) infinite var(--blink-delay);
}

…so that each character wouldn’t blink at the same time, I set a different --blink-delay before they all start blinking, by passing another Custom Property:

use[data-outlaw="1"] { --blink-delay: 1s; }
use[data-outlaw="2"] { --blink-delay: 2s; }

use[data-outlaw="7"] { --blink-delay: 3s; }

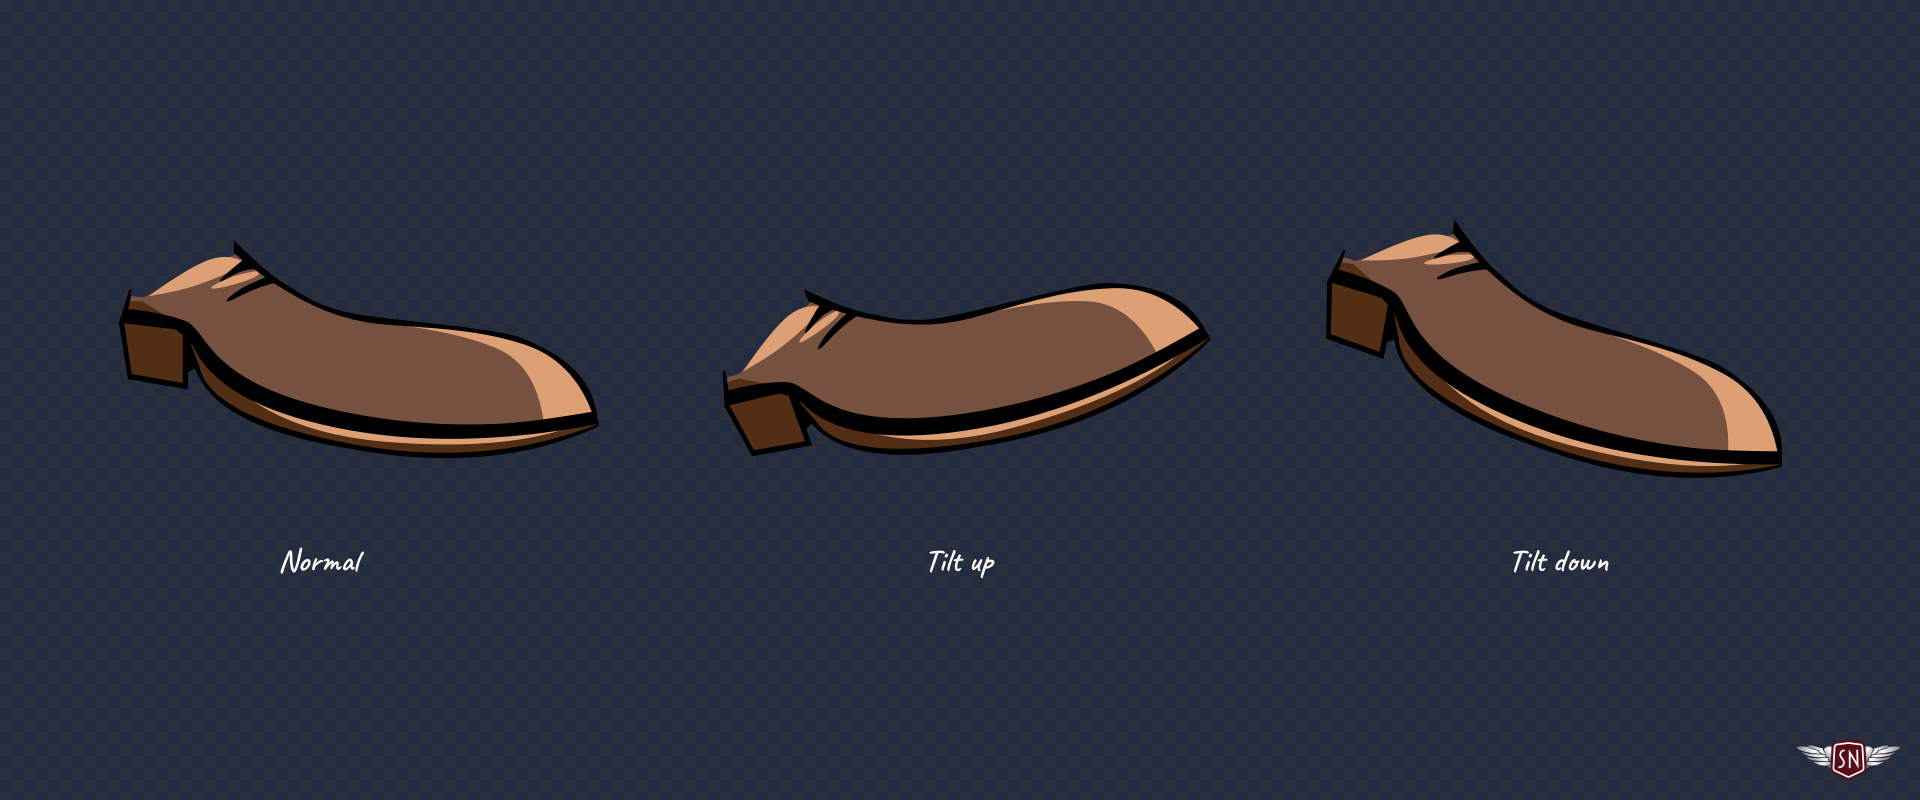
Some of the characters tap their feet, so I added an inline style with a CSS Custom Property to those groups, too:

<symbol id="outlaw-1" viewBox="0 0 712 2552">
  <g class="outlaw-1-foot" style="
    transform-origin: bottom right; 
    transform-box: fill-box; 
    transform: rotate(var(--foot-rotate));">
  </g>
</symbol>

Defining the foot-tapping animation:

@keyframes tapping {
  0%, 60%, 100% { --foot-rotate: 0deg; }
  20% { --foot-rotate: -5deg; }
  40% { --foot-rotate: 2deg; }
}

And adding those extra Custom Properties to the characters’ declaration:

use[data-outlaw] {
  --blink-duration: 4s;
  --eyelids-opacity: 1;
  --foot-rotate: 0deg;
  animation: 
    blink var(--blink-duration) infinite var(--blink-delay),
    tapping 1s ease-in-out infinite;
}

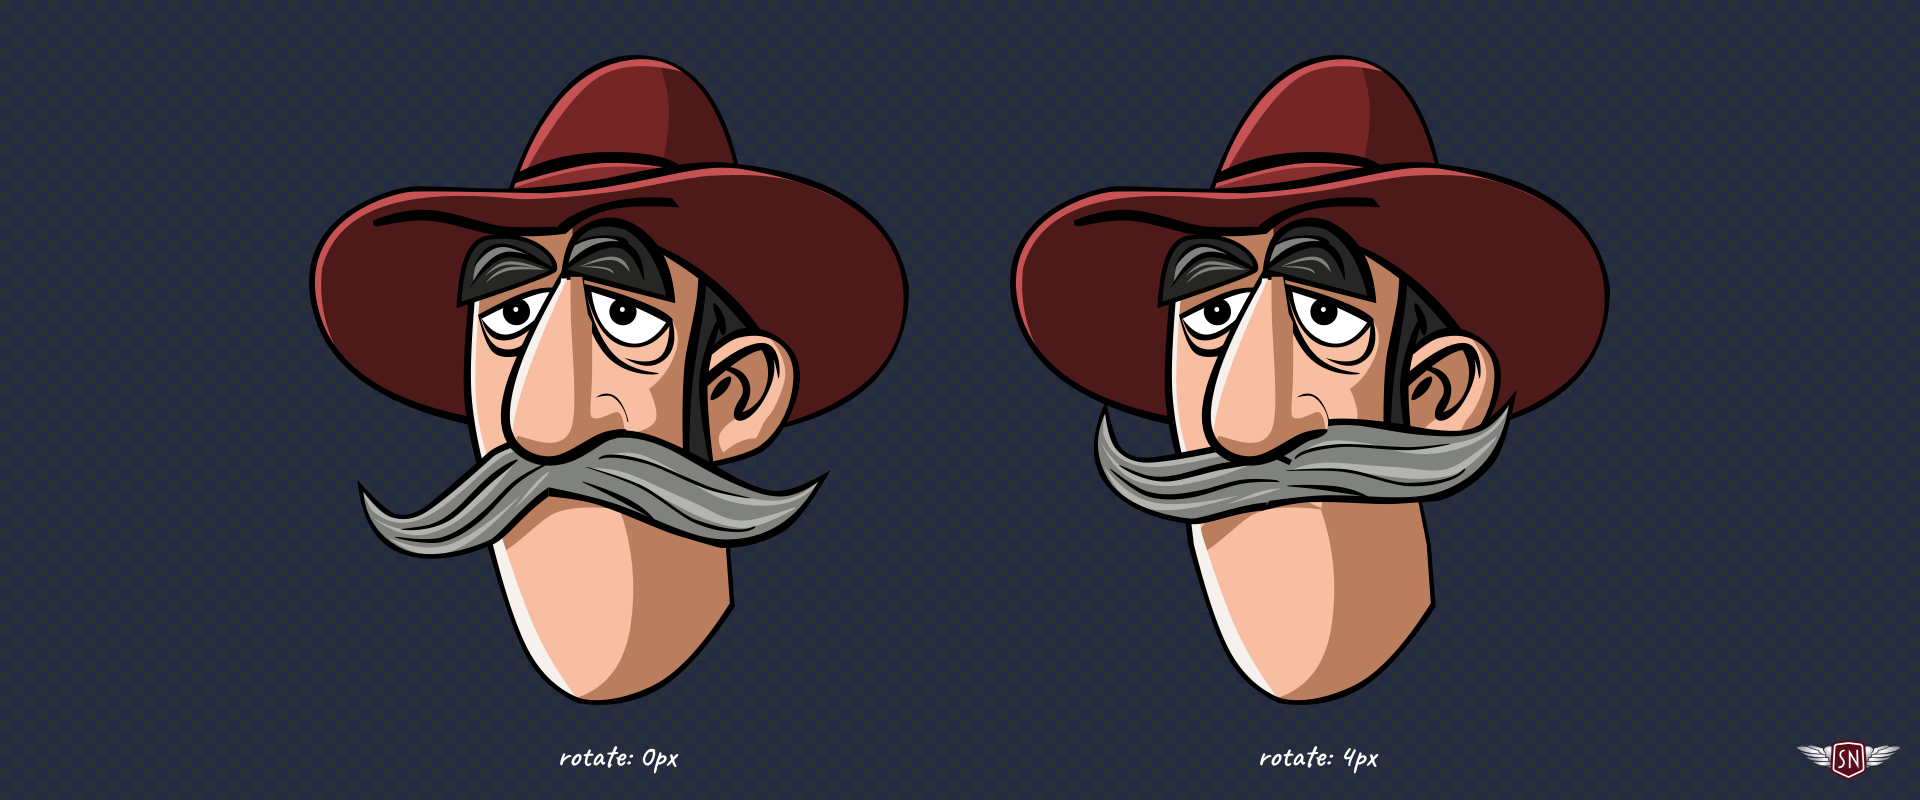
…before finally making the character’s whiskers jiggle via an inline style with a CSS Custom Property which describes how his moustache transforms:

<symbol id="outlaw-1" viewBox="0 0 712 2552">
  <g class="outlaw-1-tashe" style="
    transform: translateX(var(--jiggle-x, 0px));"
  >
    <!-- ... -->
  </g>
</symbol>

Defining the jiggle animation:

@keyframes jiggle {
  0%, 100% { --jiggle-x: 0px; }
  20% { --jiggle-x: -3px; }
  40% { --jiggle-x: 2px; }
  60% { --jiggle-x: -1px; }
  80% { --jiggle-x: 4px; }
}

And adding those properties to the characters’ declaration:

use[data-outlaw] {
  --blink-duration: 4s;
  --eyelids-opacity: 1;
  --foot-rotate: 0deg;
  --jiggle-x: 0px;
  animation: 
    blink var(--blink-duration) infinite var(--blink-delay),
    jiggle 1s ease-in-out infinite,
    tapping 1s ease-in-out infinite;
}

With these moving parts, the characters come to life, but my markup remains remarkably lean. By combining several animations into a single declaration, I can choreograph their movements without adding more elements to my SVG. Every outlaw shares the same base <symbol>, and their individuality comes entirely from CSS Custom Properties.

Pitfalls And Solutions

Even though this technique might seem bulletproof, there are a few traps it’s best to avoid:

  • CSS Custom Properties only work if they’re referenced with a var() inside a <symbol>. Forget that, and you’ll wonder why nothing updates. Also, properties that aren’t naturally inherited, like fill or transform, need to use var() in their value to benefit from the cascade.
  • It’s always best to include a fallback value alongside a custom property, like opacity: var(--eyelids-opacity, 1); to ensure SVG elements render correctly even without custom property values applied.
  • Inline styles set via the style attribute take precedence, so if you mix inline and external CSS, remember that Custom Properties follow normal cascade rules.
  • You can always use DevTools to inspect custom property values. Select a <use> instance and check the Computed Styles panel to see which custom properties are active.
Conclusion

The <symbol> and <use> elements are among the most elegant but sometimes frustrating aspects of SVG. The Shadow DOM barrier makes animating them trickier, but CSS Custom Properties act as a bridge. They let you pass colour, motion, and personality across that invisible boundary, resulting in cleaner, lighter, and, best of all, fun animations.


Read the whole story
alvinashcraft
2 hours ago
reply
Pennsylvania, USA
Share this story
Delete

Mariposa: a lightweight Swift CLI to automate sharing blog posts to social media

1 Share

After writing and publishing a new post, I always share to social media because that is how a lot of folks receive updates (also, POSSE). Because I hate using social media, I have automated this process with a lightweight CLI written in Swift called Mariposa.

The goal of Mariposa is to replace services like IFTTT or Zapier to automatically post to Bluesky and Mastodon whenever I publish a new blog post. Currently, IFTTT has integrations for posting RSS feeds to Twitter and (with some extra work) Mastodon, but it does not provide an option for automating RSS to Bluesky. Zapier offers equivalent functionality, and maybe supports Bluesky, but I’m not sure. But enough about third-party services — we don’t need them anymore!

Motivation

I wanted to stop using IFTTT, in general. I also wanted a solution for Bluesky automation which IFTTT does not support. And Twitter is dead. But more importantly, using IFTTT was always an awkward, roundabout solution anyway. I only used it because I was being lazy.

My blog is built with Jekyll (which I’ve written about before), and I publish using git. Thus, it was always a bit strange to git push and publish a new post, visit my website to verify it updated, and then wait for a random service to listen for changes to my RSS feed so it could post to social media for me. If I’m running git push to publish, I might as well run another command right then that will post to social media. So that’s what I did!

How it works

The only prerequisite is that you have a JSON feed for your blog. As mentioned, I use Jekyll for my blog, which easily accommodates generating a JSON feed. But it does not matter how you generate your site, as long as you have a feed.

If you are only generating a traditional XML RSS feed, you can borrow and adapt my JSON feed template for your needs. (And if you do not publish a feed at all, well… you should!) While I publish both RSS and JSON feeds, Mariposa only supports JSON, which comes free with Swift. And I would rather not ruin something fun by dealing with XML.

Mariposa reads a JSON feed locally from disk, and then posts the most recent entry to Bluesky and Mastodon. The content of the social media posts includes the blog post title and url. For credentials for Bluesky and Mastodon, you pass in a yaml config file. (I chose yaml for this config because it’s nicer to read and write for this type of data.)

The great thing about Jekyll (or any static site generator) is its simplicity. The generated site is output to _site/, which I can preview easily locally. The output includes my full generated JSON feed. That is all the information I need to send out a post to Bluesky or Mastodon — there is no need for services like IFTTT to listen for changes. Much simpler!

You can find more details and documentation on GitHub.

Workflow

This tool is very much something I built for myself. It is centered around my workflow and my needs. But, I think other folks with similar setups could find it useful. After finishing a blog post, here’s my workflow:

  1. Publish via git
  2. Make sure the locally generated site is up-to-date (jekyll build)
  3. Run mariposa to share it via Bluesky and Mastodon

Because I use a Makefile with phony targets as shortcuts for scripts and commands, the above simplifies to:

  1. make build (build the site locally)
  2. make pub (publish changes to web server)
  3. make social (share post on social media)

Example usage

In this example, I’ve cloned the repo to ~/Developer/mariposa/. The config file with my credentials is stored in my home directory at ~/.mariposa_config.yml. The command is run from the root directory of my website and my generated feed is stored in _site/feed.json.

Below is the output for sharing this very blog post!

swift run --package-path ~/Developer/mariposa/ mariposa -c ~/.mariposa_config.yml -f _site/feed.json

👀 Preview:
    Mariposa: a lightweight Swift CLI to automate sharing blog posts to social media
    https://www.jessesquires.com/blog/2025/11/07/mariposa/

➡️  Continue? (y/N): y

Posting to Bluesky... success ✅
https://bsky.app/profile/jessesquires.com

Posting to Mastodon... success ✅
https://mastodon.social/@jsq/115509326819194206

🎉 Finished

Developer notes

I had a lot of fun building this over the course of an afternoon. The Mastodon API and Bluesky API were both pretty easy to work with. Many thanks to Manton Reece for writing this blog post, which helped me get started even more quickly with the Bluesky API, which was a bit trickier.

Mariposa is published as a Swift Package. It depends on JP’s Yams library for parsing the yaml config, and the swift-argument-parser for the CLI. This was my first time using swift-argument-parser — and wow, that library is fucking awesome. I barely had to write any code and everything just worked. Other than these two libraries, it’s just Foundation and the Standard Library.

Again, this is very much a tool I wrote for myself. It supports a very small subset of the Mastodon API and Bluesky API — only the parts I needed. I wrote my own lightweight clients because using a third-party API client library felt like overkill. I made the package very modular, so it should be easy to add features or modify it however you like.

You probably noticed this is actually partially automated. I have to manually run mariposa after publishing a post. I could have run this on the web server via a git hook, tracked what entries have already been shared, etc. — but that would have required a lot of additional complexity that was not worth the time or effort to me. You could surely automate fully if desired.

All the code is on GitHub. Check it out, and feel free to send me a pull request!


Originally published on jessesquires.com.

Hire me for iOS freelance and contracting work.

Buy my apps.

Sponsor my blog and open source projects.

Read the whole story
alvinashcraft
2 hours ago
reply
Pennsylvania, USA
Share this story
Delete

IntelePeer supercharges its agentic AI platform with Azure Cosmos DB

1 Share

Reducing latency by 50% and scaling intelligent CX for SMBs

This article was co-authored by Sergey Galchenko, Chief Technology Officer, IntelePeer, and Subhash Ramamoorthi, Director, IntelePeer AI Hub.


Don’t miss: Discover how IntelePeer enhances agent intelligence and powers their multi-agent applications at Ignite! Join us for From DEV to PROD: How to build agentic memory with Azure Cosmos DB Thursday, Nov. 20, 11 AM PST.


You don’t need to be an AI expert, software engineer, or data scientist to understand the importance of system reliability and performance in digital customer service platforms. If you’ve ever tried to schedule a dental appointment, contact your bank about your account, or check on the status of your takeout order, then you’ve experienced it firsthand.

While large companies have long used sophisticated AI-powered call center solutions, we work with many small and medium-sized businesses (SMBs) that are now adopting next-generation customer experience (CX) platforms like IntelePeer. Our solutions offer high reliability, conversational AI accuracy, low latency for voice, LLM and API processing, and—most importantly—scalability to maintain system performance during spikes in customer contact volumes. These surges in demand don’t discriminate by industry, for example:

  • Retail: During the holiday season—especially Black Friday and Cyber Monday— retail call centers see call volumes increase by up to 41 percent as customers inquire about order status, returns, and promotions.
  • Healthcare: Open enrollment periods for insurance or the start of a new year for dental/medical plans trigger a rush of calls from patients seeking appointments and coverage details.
  • Travel: Airlines and travel agencies face spikes during summer vacations, winter holidays, or when flight disruptions create a wave of rebooking inquiries that overwhelm agents.
  • Utilities: Severe weather like hurricanes or snowstorms can damage infrastructure, causing a flood of calls from customers seeking outage updates.
  • Finance: Tax season and year-end financial reporting lead to increased inquiries about filings, refunds, and account management.
  • Technology: Major updates or service outages can result in sudden spikes in support calls as customers seek troubleshooting help.

To meet these challenges, we designed IntelePeer with scalable infrastructure and an AI framework that allows SMB to deliver quality call center services even during high-traffic surges. Elasticity and scalability are crucial for maintaining resilience, cost-effectiveness, and CX performance in dynamic environments. They’re also part of the reason why we migrated our AI framework to Azure and adopted Azure Cosmos DB.

Moving the AI framework to Azure to minimize latency

When it comes to conversational AI, managing latency is essential for ensuring natural-sounding and efficient interactions for customers. The IntelePeer platform handles this complex task by continuously monitoring and adjusting for multiple factors that affect latency: inference speed for the large language model (LLM), time to first byte for the text-to-speech engine, processing delay for the APIs, network latency, and others.

CLO25b Developer Office 2 imageWe deployed our first-generation AI framework in IntelePeer data centers. But after observing telemetry data and analyzing latency factors in the value delivery chain, we decided to implement our next-generation agentic AI framework in Azure to minimize network-induced latency. We were already heavy users of Azure OpenAI in Foundry Models and this move brought our AI framework closer to the LLMs. At the same time, we profiled the database performance and chose Azure Cosmos DB as our persistence and data layer.

Since migrating to Azure Cosmos DB, we’ve seen at least a 50 percent decrease in network and data access-related latency—going from roughly 35 milliseconds (ms) to 15 ms for each transaction roundtrip. We’ve also started using the small language model (SLM) Phi-4 for some use cases as we consolidated all our database workloads (configuration persistence, session storage/agent short-term memory and vector search) to Azure Cosmos DB.

With Azure Cosmos DB it’s day and night compared to self-managed clusters

Before moving to Azure, our platform ran on self-managed MongoDB clusters hosted in our data centers. While this setup worked initially, we encountered scaling issues as we grew. We had to size our clusters for seasonal peak performance, even though 90 percent of the time we didn’t need that capacity. That meant wasted resources and higher costs.

Even with overprovisioning, we had physical limitations on the amount of I/O we could give to database clusters. Because datasets with vastly different usage patterns shared the same physical infrastructure and the same I/O pools, when one workload started pulling harder, it could affect the performance of other applications.

We don’t have that problem in the Azure Cosmos DB environment because of its auto-scaling and logical isolation capabilities. It gives us fine-grained performance controls so we can configure our I/O profile per container. That way we can make decisions between which long queries are fine to run and which need to have 15 ms latency because of other SLAs upstream. The separation gives us these controls. It’s night and day compared to self-managed clusters.

Azure Cosmos DB’s MongoDB compatibility was another major advantage. It allowed us to migrate our existing codebase with minimal changes, while its built-in change data capture (CDC) capability made it easy to stream data into our analytics pipeline. We also plan to use native replication to maintain a live copy of our production dataset outside of Azure for disaster recovery purposes.

For our agentic AI framework, we use Azure Cosmos DB for both short-term and long-term memory. A very useful feature in the short-term memory subsystem has been TTL indexing. We can now set automatic expiration policies at the container or item level, letting Azure Cosmos DB automatically purge old data without impacting performance. This has been crucial for managing log data, session information, and temporary caches that previously cluttered our databases and degraded performance over time. Additionally, we use CDC to integrate a data processing pipeline that ingests short-term session data and propagates it into the long-term memory data subsystem. The long-term memory layer persists agent configuration states, user personalization parameters, organizational metrics, and other contextual data, enabling continuous improvement of AI agent behavior and enhancing overall system performance.

Detecting voicemail boxes at 97% accuracy with Phi-4

Female developer working on a laptop wearing headphones. programmer; working open space; typing; professional developer; prodev; pro dev; work anywhere;headphones. This architecture has served us well across the board, but for voicemail recognition specifically, we’ve made huge gains using the SLM Phi-4. In outbound campaigns—whether it’s appointment reminders, payment collections, or follow-up notifications—we need to know right away if our platform is connecting to a live person or a voicemail. Our old detection system relied on hard-coded rules and call control signals. The accuracy was hovering under 40 percent, which is basically the same as flipping a coin.

When we decided to use AI for voicemail detection, we ran the first 15 seconds of conversations through an LLM and accuracy immediately jumped to 90 percent. That was a big improvement, but it came at a cost. Running every call through an LLM was too expensive for a simple repeatable task.

Then we turned to our agentic long-term memory subsystem for the training data. Using Azure Cosmos DB, it was easy to identify the conversations that successfully detected voicemails. We used that data as a self-labeled training dataset for an SLM and fine-tuned smaller models with a LoRA approach. After experimenting with various open-weights SMLs, we ultimately chose Phi-4. Fine-tuned in Azure Open AI in Foundry Models, Phi-4 delivered 97 percent accuracy. That’s better than a human agent performing detection live, and it’s dramatically cheaper than pushing everything through a larger, but more generic model.

Converting FAQ docs into embeddings for smarter AI agents

With our agentic AI workflows up and running on Azure, we wanted to make sure our conversational AI was providing the best possible answers to customers. Many of the questions our AI agents handle are about store hours, policies, or post-appointment instructions. That information exists in PDFs, websites, and knowledge bases, but the trick is making it accessible in real time during a voice conversation. To that end, we implemented a Retrieval Augmented Generation (RAG) pattern using vector search as a data store.

Our vector search uses text-embedding-ada-002 with 1,536 dimensions for generating high-quality embeddings that capture semantic meaning and nuance across our knowledge base and conversation data while using manageable amounts of processing power.

When evaluating Azure Cosmos DB’s flat, quantized flat, and DiskANN vector indexing options, we settled on DiskANN. It provides the low-latency performance critical for real-time applications while maintaining the accuracy needed for production workloads. During live user sessions, agents execute vector-based queries against the knowledge base. For complex user inputs, the agent computes an embedding representation of the query and performs a similarity search over pre-indexed knowledge documents to retrieve the most relevant context.

This happens in real time during voice calls, where every millisecond counts. The 15ms vector query latency we achieve with DiskANN ensures natural conversation flow without awkward pauses. The retrieved data is combined with LLM reasoning capabilities, delivering accurate answers with extremely low latency.

Investing in Azure to deliver agentic AI for SMBs

Our investment in Azure has more than paid off. We cut latency in half, simplified our infrastructure, and focused our resources on innovating new capabilities rather than managing hardware.

At IntelePeer, we’re focused on equipping SMBs with the same level of intelligent CX performance that was historically reserved for enterprise-scale organizations. By using Azure services like Azure Cosmos DB and Azure OpenAI in Foundry Models, we’ve developed scalable, AI-driven systems that enable SMBs to measurably improve efficiency, costs, and customer and patient satisfaction.

More importantly, we’re demonstrating that world-class CX solutions aren’t just practical and affordable for SMBs—they’re vital for solving the pressing operational and financial challenges facing the business, healthcare, and service organizations we all rely on every day.

About the authors

sergey galchenko image Sergey Galchenko serves as Chief Technology Officer at IntelePeer, responsible for developing technology strategy plans aligning with IntelePeer’s long-term strategic business initiatives. Relying on modern design approaches, Sergey has provided technical leadership to multi-billion-dollar industries, steering them toward adopting more efficient and innovative tools. With extensive expertise in designing and developing SaaS product offerings and API/PaaS platforms, he extended various services with ML/AI capabilities.
Subhash Ramamoorthi image Subhash Ramamoorthi is Director of IntelePeer’s AI Hub. With over twenty years of extensive experience in system design and architecture, Subhash brings a wealth of knowledge and expertise to his position. His diverse skillset spans a wide range of technologies and solutions, allowing him to effectively lead and guide teams in the realm of AI.

About Azure Cosmos DB

Azure Cosmos DB is a fully managed and serverless NoSQL and vector database for modern app development, including AI applications. With its SLA-backed speed and availability as well as instant dynamic scalability, it is ideal for real-time NoSQL and MongoDB applications that require high performance and distributed computing over massive volumes of NoSQL and vector data.

To stay in the loop on Azure Cosmos DB updates, follow us on XYouTube, and LinkedIn.

The post IntelePeer supercharges its agentic AI platform with Azure Cosmos DB appeared first on Azure Cosmos DB Blog.

Read the whole story
alvinashcraft
2 hours ago
reply
Pennsylvania, USA
Share this story
Delete

The Book of Redgate: What Our Customers Say

1 Share

This is from 2010, but I loved that people felt this way about Redgate Software. A lot of these words are things that we aim to express to each other and to customers.

2025-10_line0104

Ingeniously Simple was a tagline that our founders aimed for with our first products. I still remember this and challenge developers to work towards this. However, I love these words being things that stand out: calm, dependable, Gold-Standard, Excellent, Trustworthy, even Love.

I have been proud to be a part of Redgate, and I want to ensure that customers not only get value from us for the money they spend, but that they want to, and like to, do business with us.

I have a copy of the Book of Redgate from 2010. This was a book we produced internally about the company after 10 years in existence. At that time, I’d been there for about 3 years, and it was interesting to learn a some things about the company. This series of posts looks back at the Book of Redgate 15 years later.

The post The Book of Redgate: What Our Customers Say appeared first on SQLServerCentral.

Read the whole story
alvinashcraft
2 hours ago
reply
Pennsylvania, USA
Share this story
Delete

A Little About Serializable Escalation In SQL Server

1 Share

A Little About Serializable Escalation In SQL Server


Going Further


If this is the kind of SQL Server stuff you love learning about, you’ll love my training. I’m offering a 75% discount to my blog readers if you click from here. I’m also available for consulting if you just don’t have time for that, and need to solve database performance problems quickly. You can also get a quick, low cost health check with no phone time required.

The post A Little About Serializable Escalation In SQL Server appeared first on Darling Data.

Read the whole story
alvinashcraft
2 hours ago
reply
Pennsylvania, USA
Share this story
Delete

Understanding prompt injections: a frontier security challenge

1 Share
Prompt injections are a frontier security challenge for AI systems. Learn how these attacks work and how OpenAI is advancing research, training models, and building safeguards for users.
Read the whole story
alvinashcraft
2 hours ago
reply
Pennsylvania, USA
Share this story
Delete
Next Page of Stories